Android XML: Text input. EditText
In the previous lessons, we looked at how to use TextView and Button.
In this lesson, we will look at how to use text input in Android. Text input in Android is implemented using the EditText tag in XML. To do this, we will replace the Button tag from previous lesson with EditText with a minimal set of attributes. The example code looks like this:
<?xml version="1.0" encoding="UTF-8" ?>
<androidx.constraintlayout.widget.ConstraintLayout xmlns:android="http://schemas.android.com/apk/res/android"
    xmlns:app="http://schemas.android.com/apk/res-auto"
    android:layout_width="match_parent"
    android:layout_height="match_parent">

    <EditText
        android:layout_width="wrap_content"
        android:layout_height="wrap_content"
        app:layout_constraintTop_toTopOf="parent"
        app:layout_constraintEnd_toEndOf="parent"
        app:layout_constraintStart_toStartOf="parent"
        app:layout_constraintBottom_toBottomOf="parent"/>

</androidx.constraintlayout.widget.ConstraintLayout>
And if we run our application - we won't see anything.
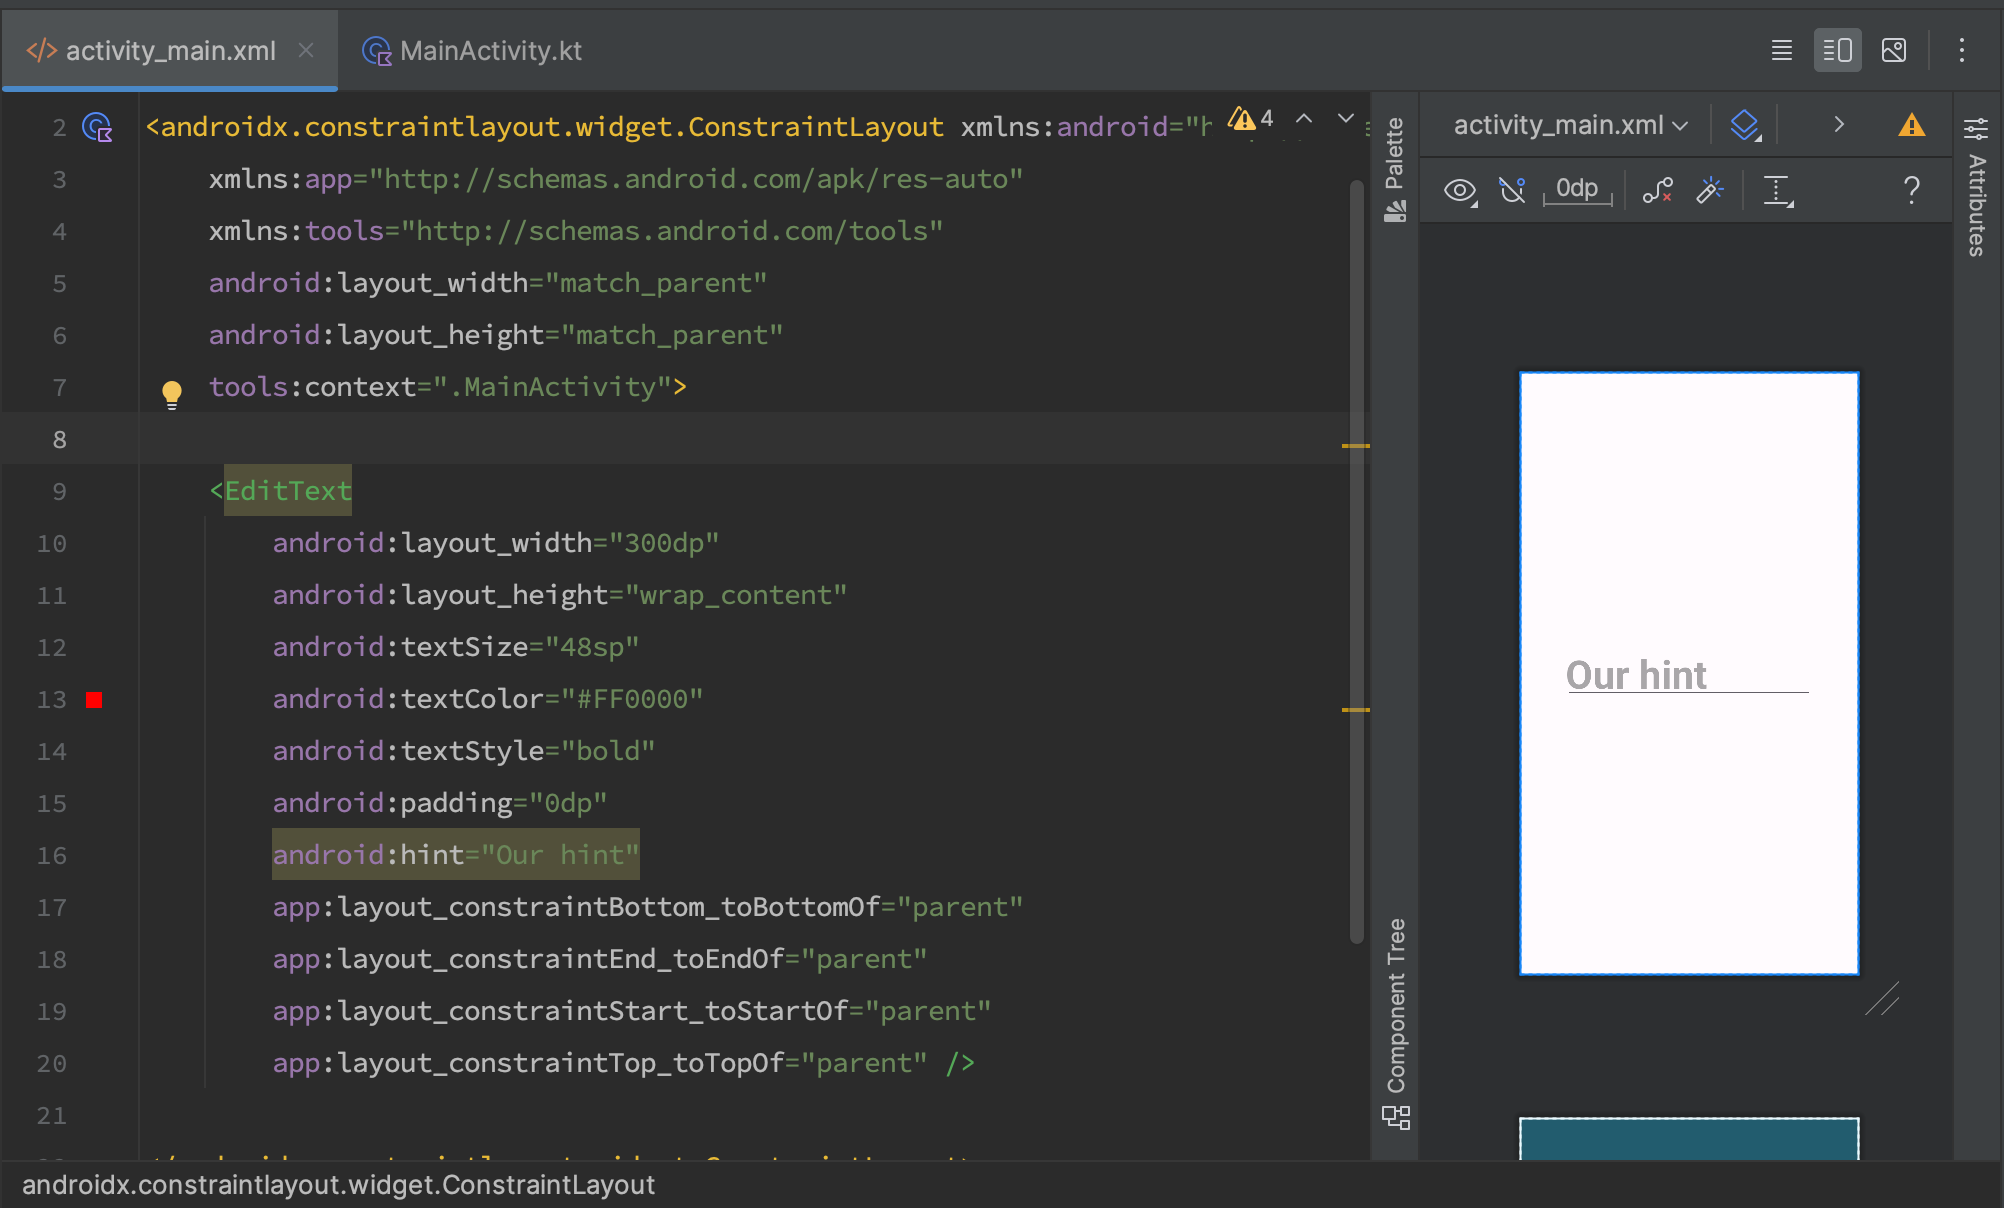
We need to consider that the size of our input field is wrap_content, meaning its width changes dynamically with each character entered. Let's set the width to android:layout_width="300dp". Add the attribute android:hint="Our Hint" and remove the android:text attribute. Our code and preview will look like this:

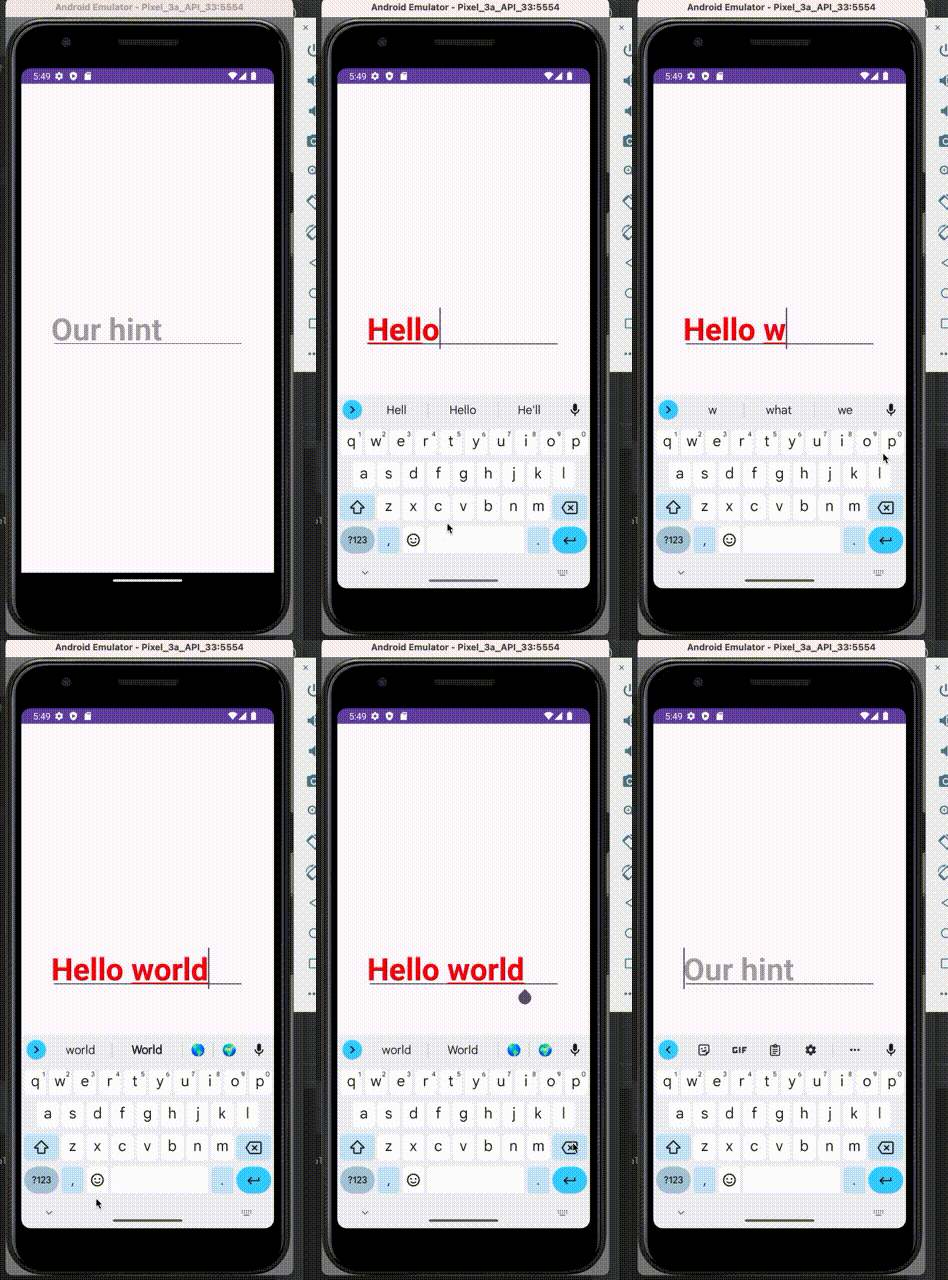
We run it and see what we get.

Now, step by step, let's see what each attribute is responsible for.
- android:padding - Responsible for the padding inside the element. We looked at this in previous lessons.
- android:hint="" - Responsible for the text we will see in our input field if the user hasn't entered anything or has deleted all text.
- android:textSize="" -Responsible for the text size.
- android:textStyle="" -Responsible for the text style. It can be:
- “bold” - bold.
- “italic” - italic.
- “normal” - regular. By default, this is used.
Other frequently used attributes for EditText are:
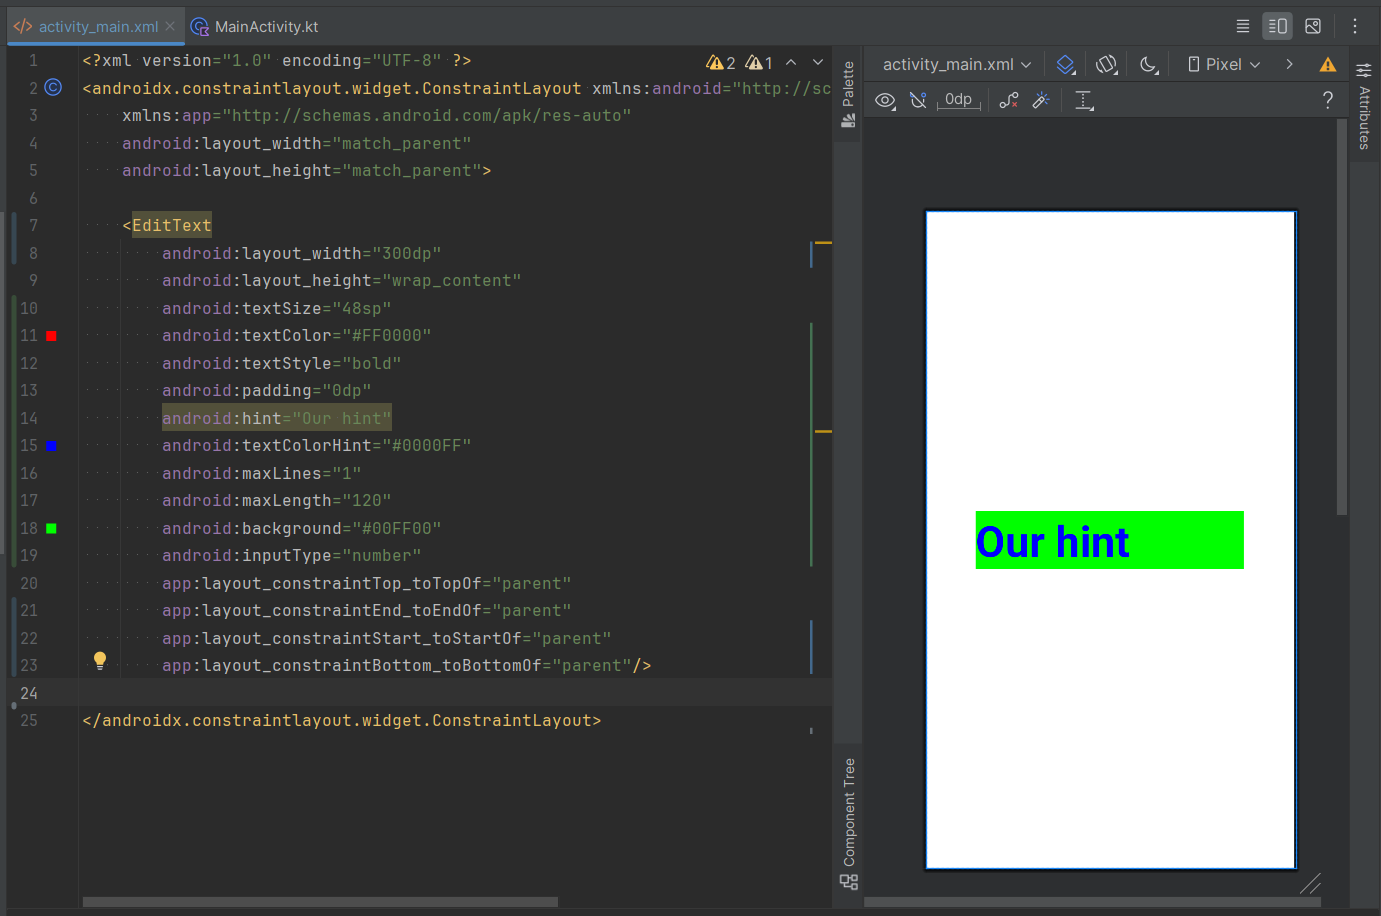
- android:textColorHint="#0000FF" - Responsible for the color of our hint.
- android:maxLines="1" - Responsible for the number of lines and their wrapping. If set to 1 line, EditText will scroll horizontally.
- android:maxLength="120" - Responsible for the maximum number of characters entered.
- android:background="#00FF00" - Responsible for the background of the entire EditText (a common property for all elements in XML).
- android:inputType="number" - Responsible for the type of keyboard and type of data that can be entered.
And all together in the code it looks like this:

In the next lesson, we will look at how to create containers and how to arrange elements in Android.
Have a question? Ask our community in Telegram - Start-Develop RU / Start-Develop EN