Project strucutre
In the previous lesson, we created our first project and saw that Android Studio started syncing. After the project synchronization is complete, Android Studio is ready to work.
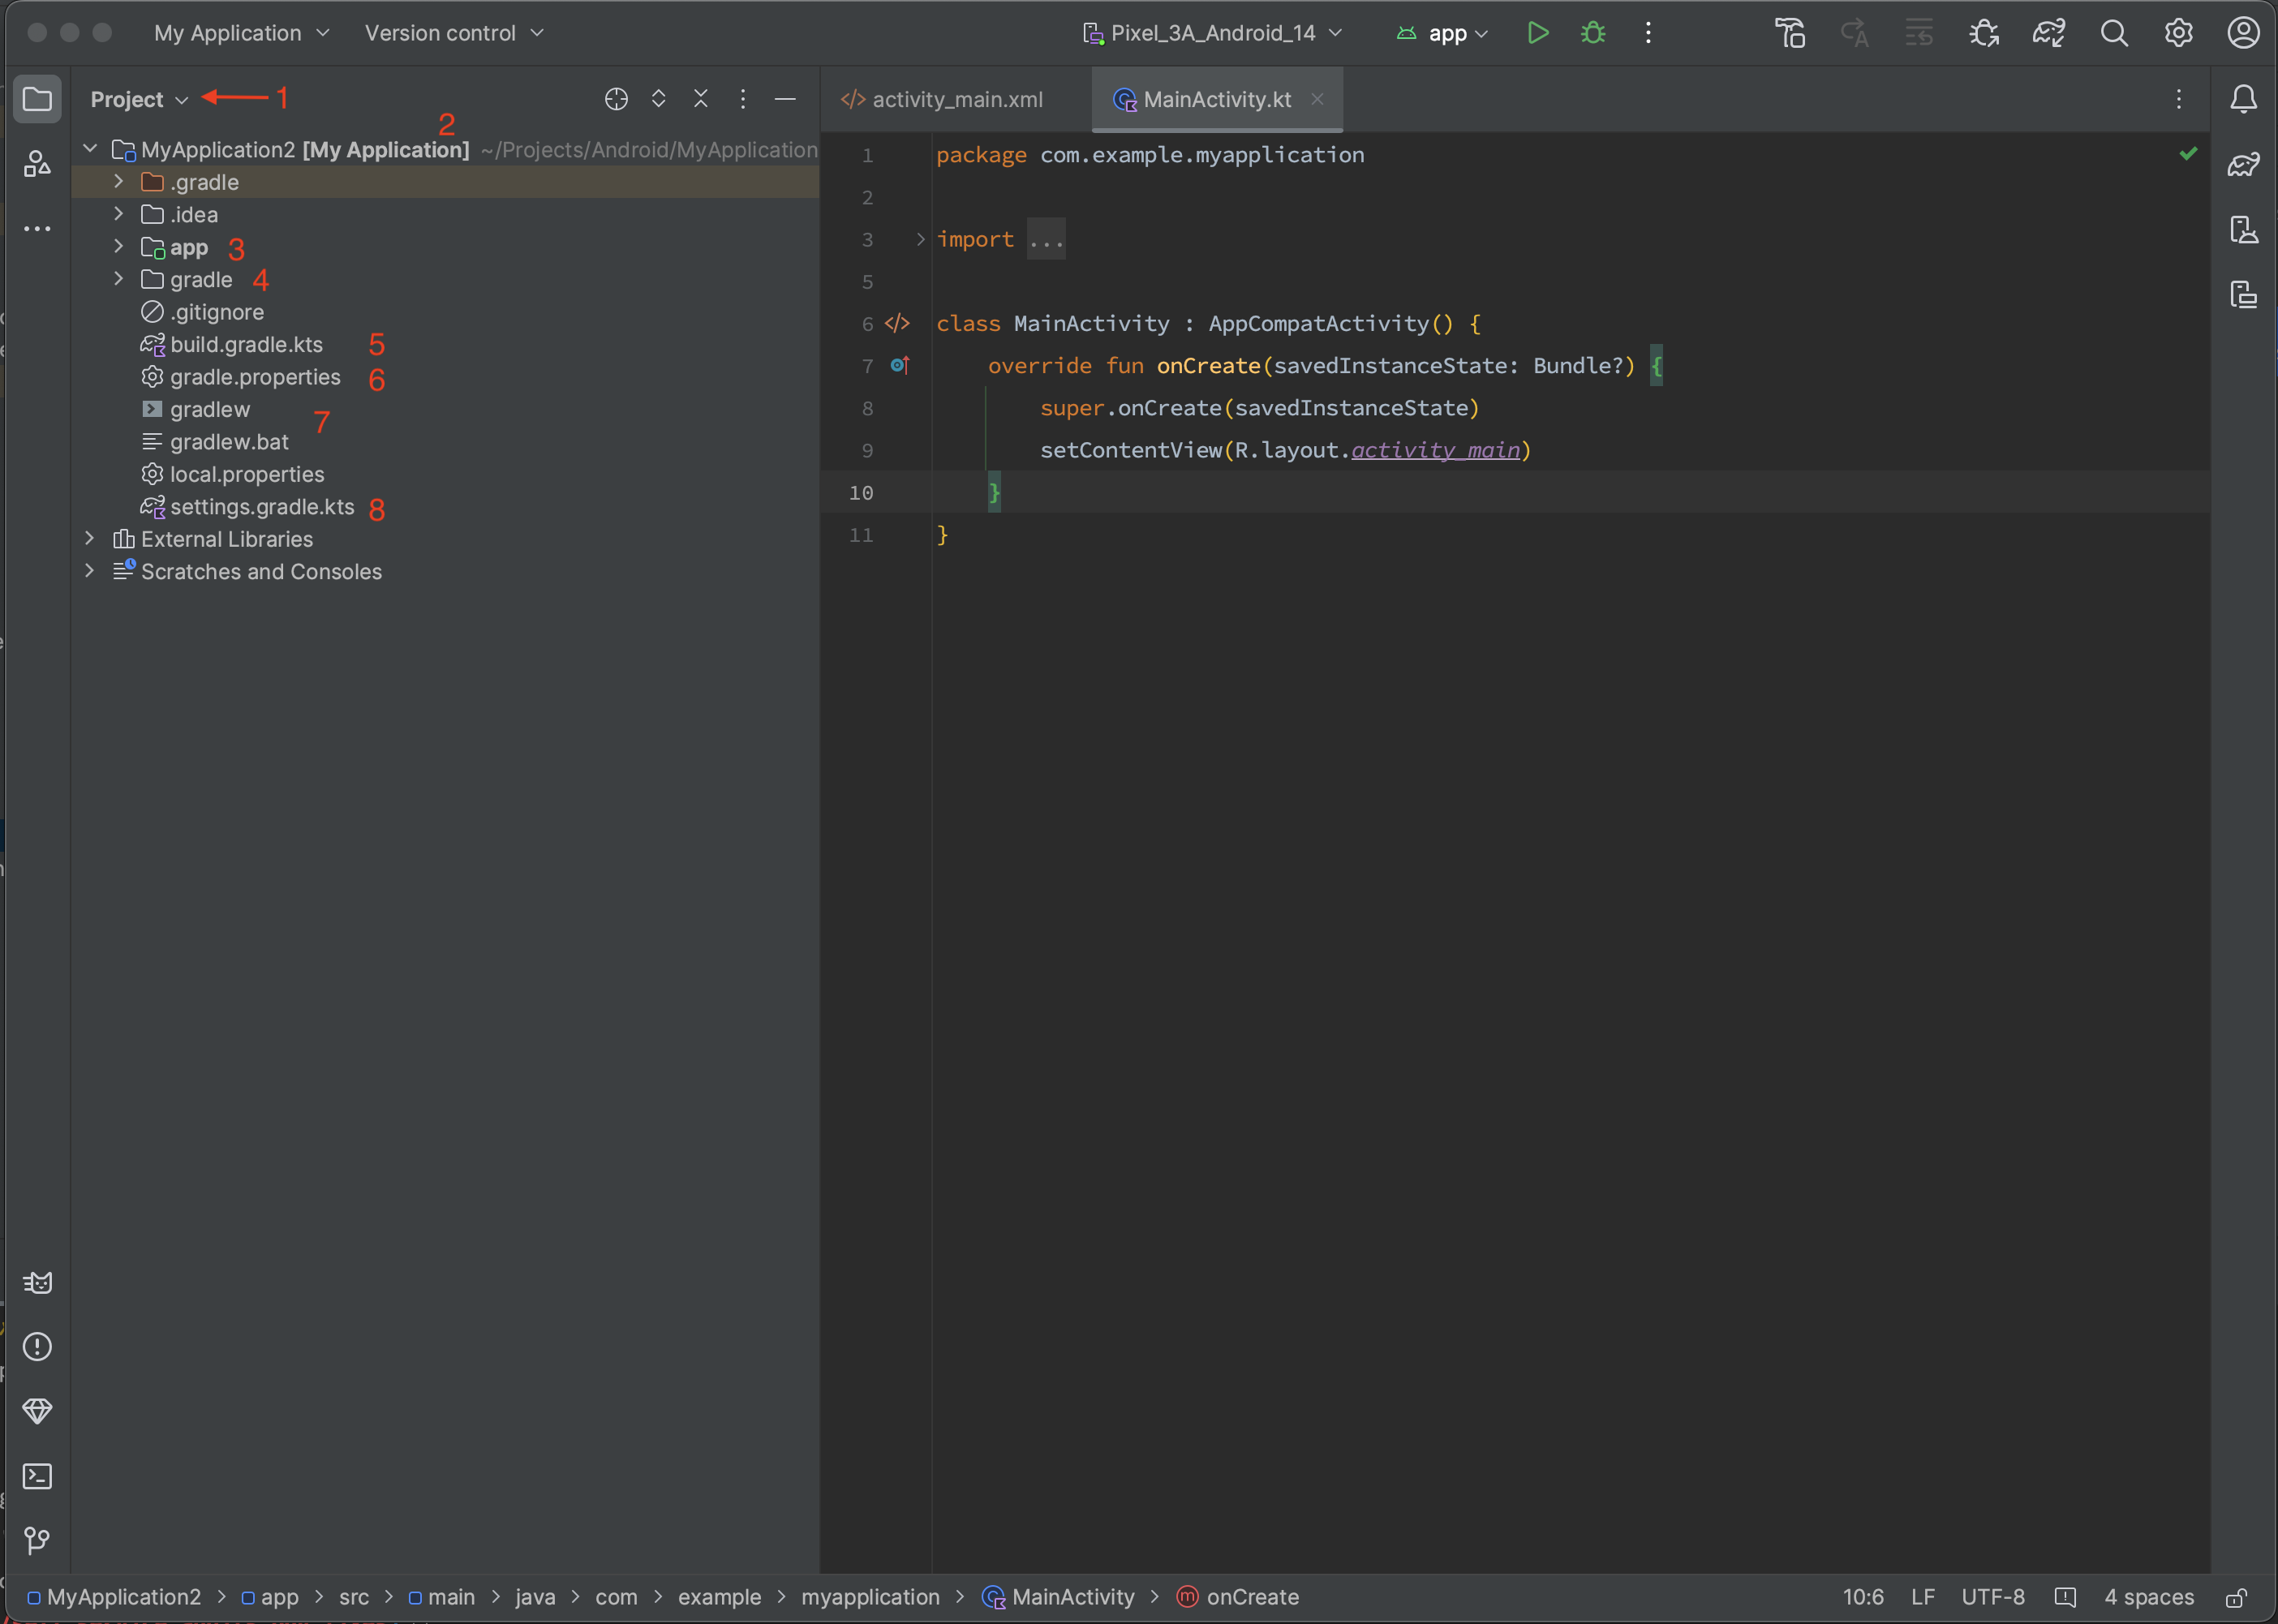
In this lesson, we will familiarize ourselves with the project structure. We will find out where and why files and folders are located. To navigate files and folders more conveniently, we need to switch the view of our folder structure to "Project," as shown in point 1 in the screenshot below:

- DropDown menu with different options how to display project files
- MyApplication2 [My Application] - This is the folder name (the full path is visible in gray) and the name of your application. These are the details you provided when creating the project.
- app - This is the folder / module where your application's source code resides. It's the standard module for your app and can be renamed in project build settings. A module can be as either a library or a standalone main application.
- gradle - This folder contains the project's build system, which is based on Gradle. Inside this folder, you'll also find a file listing all the libraries used in your project. You can configure the path to this file in Gradle build settings.
- build.gradle.kts - This is the main project build file. Since Gradle can build projects in various languages, in this file we give some info that this is an Android project. It also lists the plugins used for building, which can extend or modify the build process.
- gradle.properties - This file contains various variables for the build system. You can set parameters like the amount of RAM allocated, paths to the Android SDK, authentication data for plugins (if you're using paid plugins), and more.
- gradlew / gradlew.bat - These are executable files used to run the build system, one for Linux/Unix and one for Windows. Typically, you'd use these files to build the final product. If you want to share your app with someone, you can execute commands like "./gradlew assembleRelease" or "./gradlew assembleDebug" in the terminal.
- settings.gradle.kts - This file configures modules within your app and their dependencies. In other words, it specifies where the build system should find plugins and libraries. While we specify which plugin to use in point 4, point 7 tells us where to obtain that plugin.
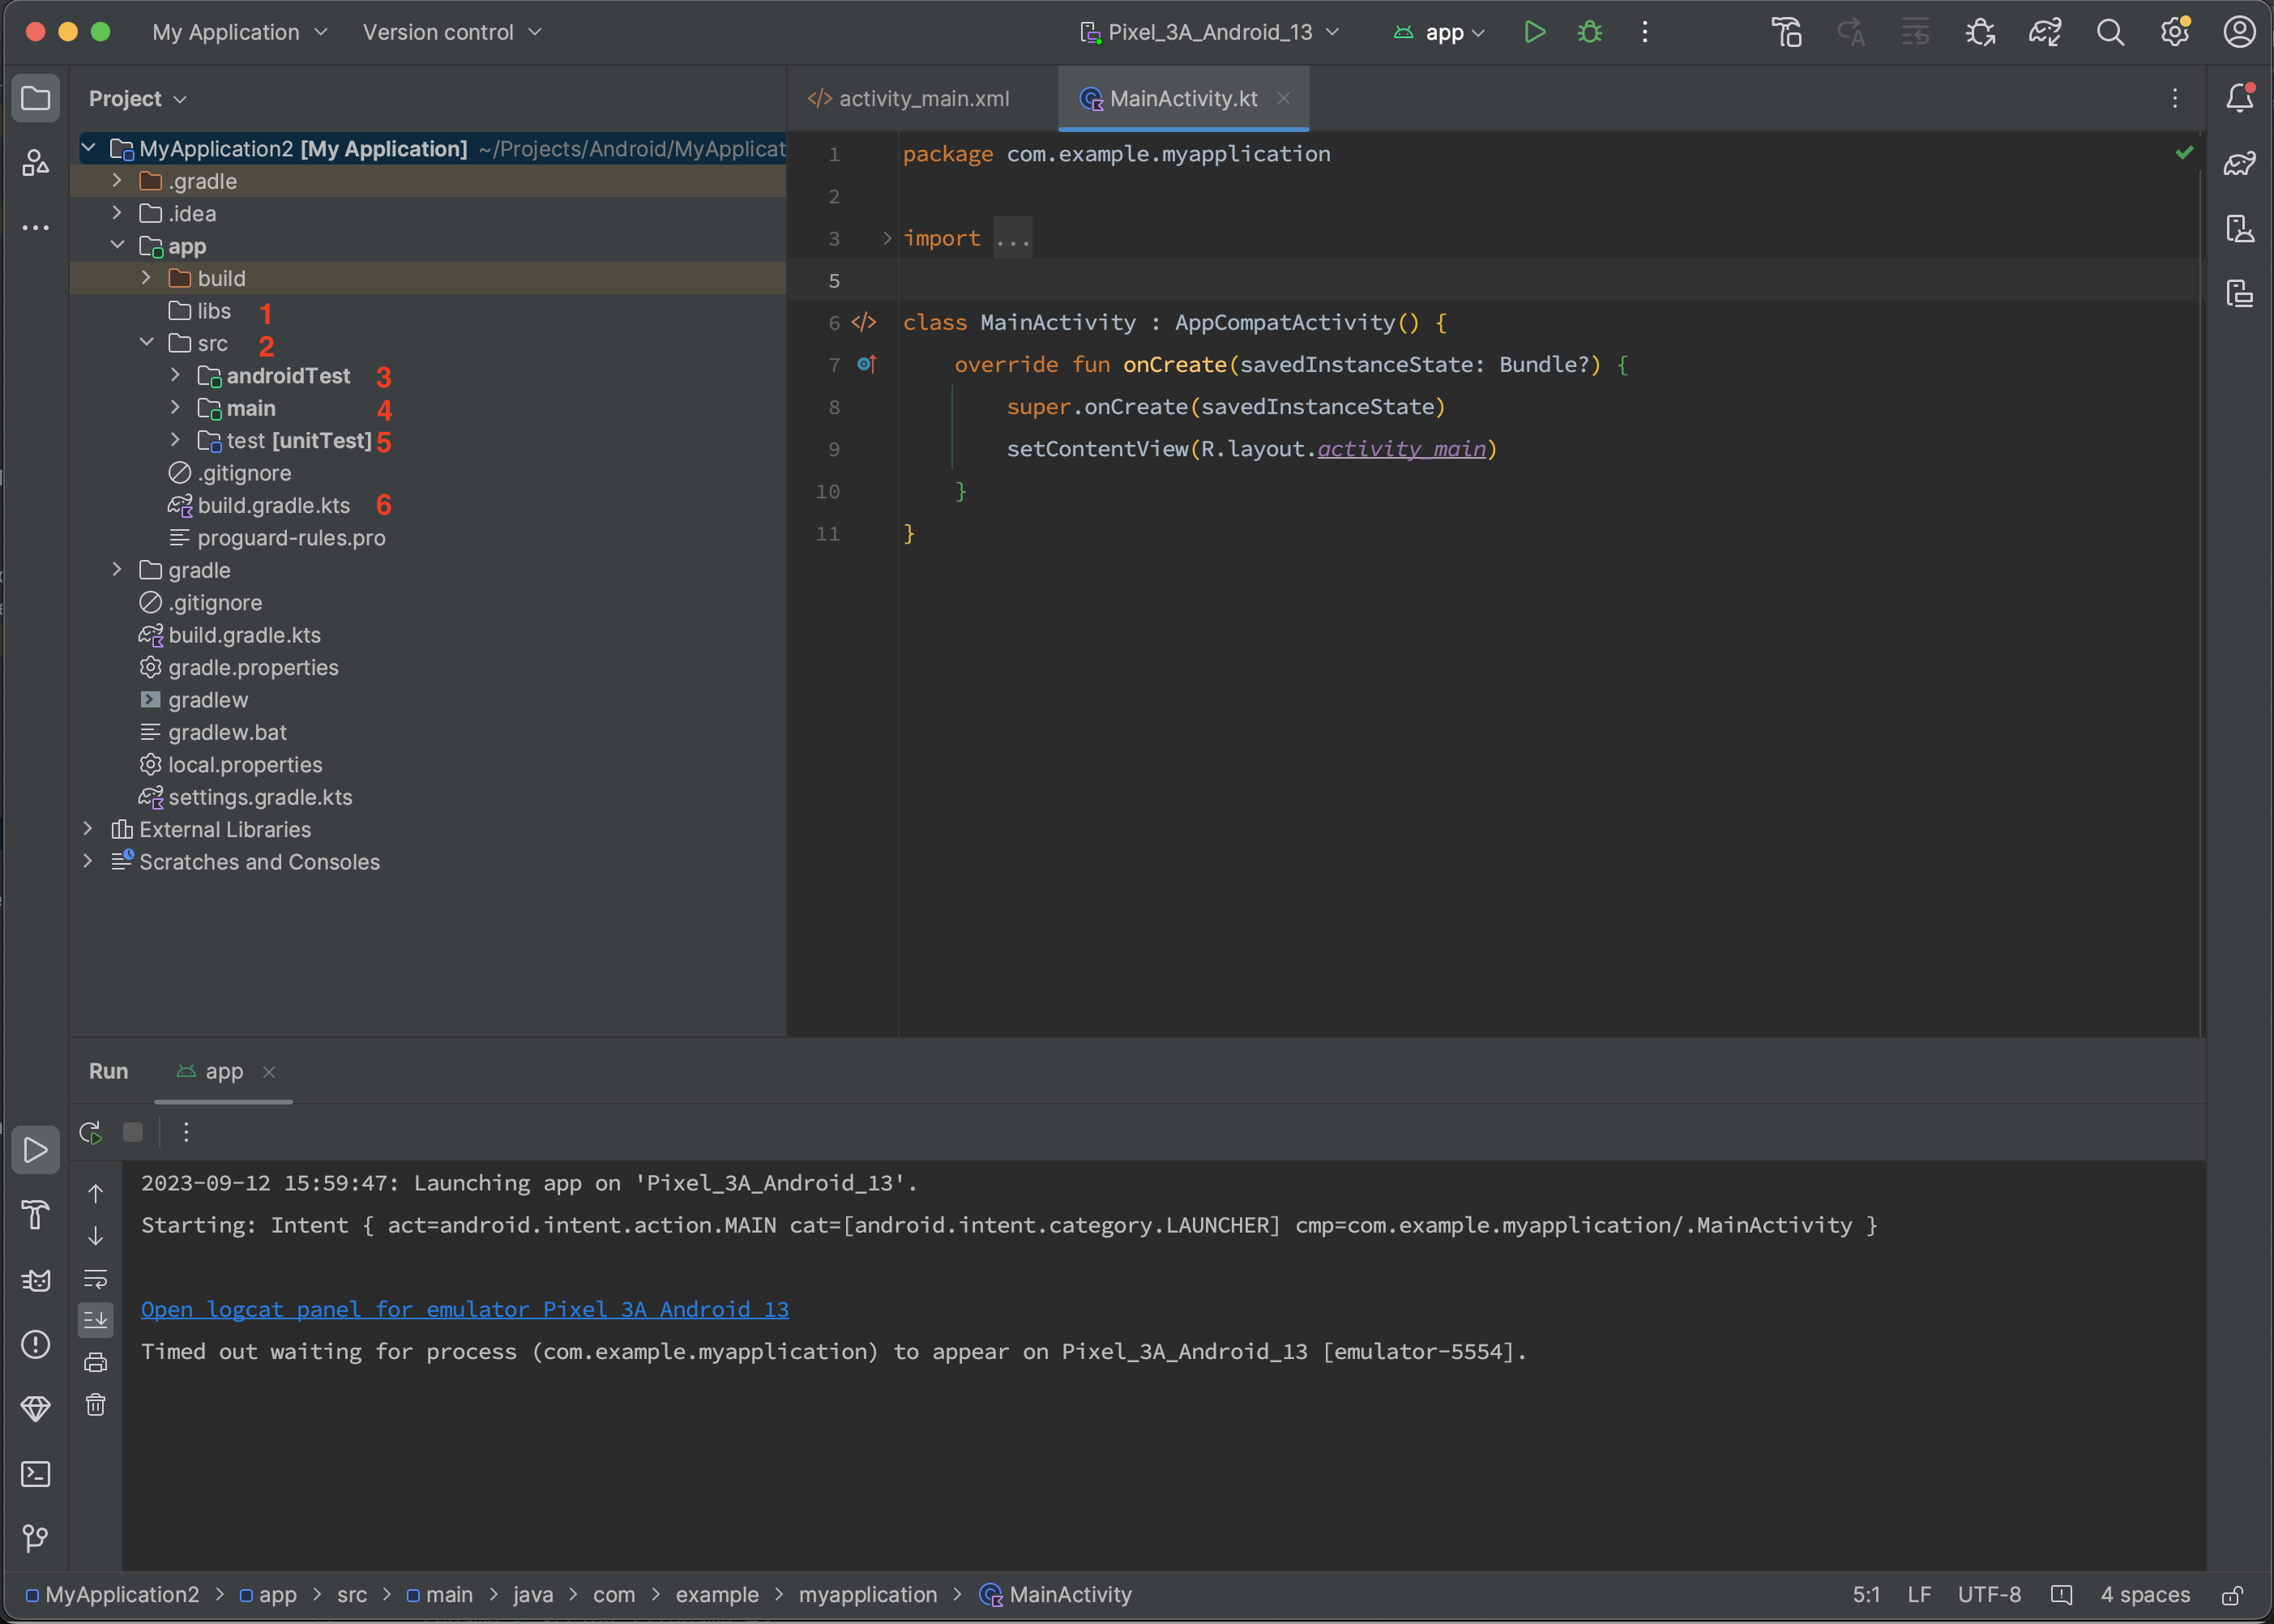
Now, let's explore the folders and files inside the "app" folder, which is the core of our project. Let's see what our project/module consists of and where the source code is located, as shown in the screenshot below:

Starting from the top of the list:
- libs - This folder is where you place precompiled files/libraries. These can be either .jar (Java / Kotlin) or .aar (Android).
- src - This folder contains the source code for your app and tests.
- androidTest inside the src folder - This is where files for unit tests, which run on emulators and real devices, are located.
- main - This is the main folder containing the source code written in Java / Kotlin / C / C++ and application resources.
- test inside the src folder - This folder contains files for unit tests, which also run on emulators and real devices.
- build.gradle.kts - This file configures the build system for your module. Yes, there's a similar file for the entire project, but the one in point 6 is specific to the current module, not the entire project.
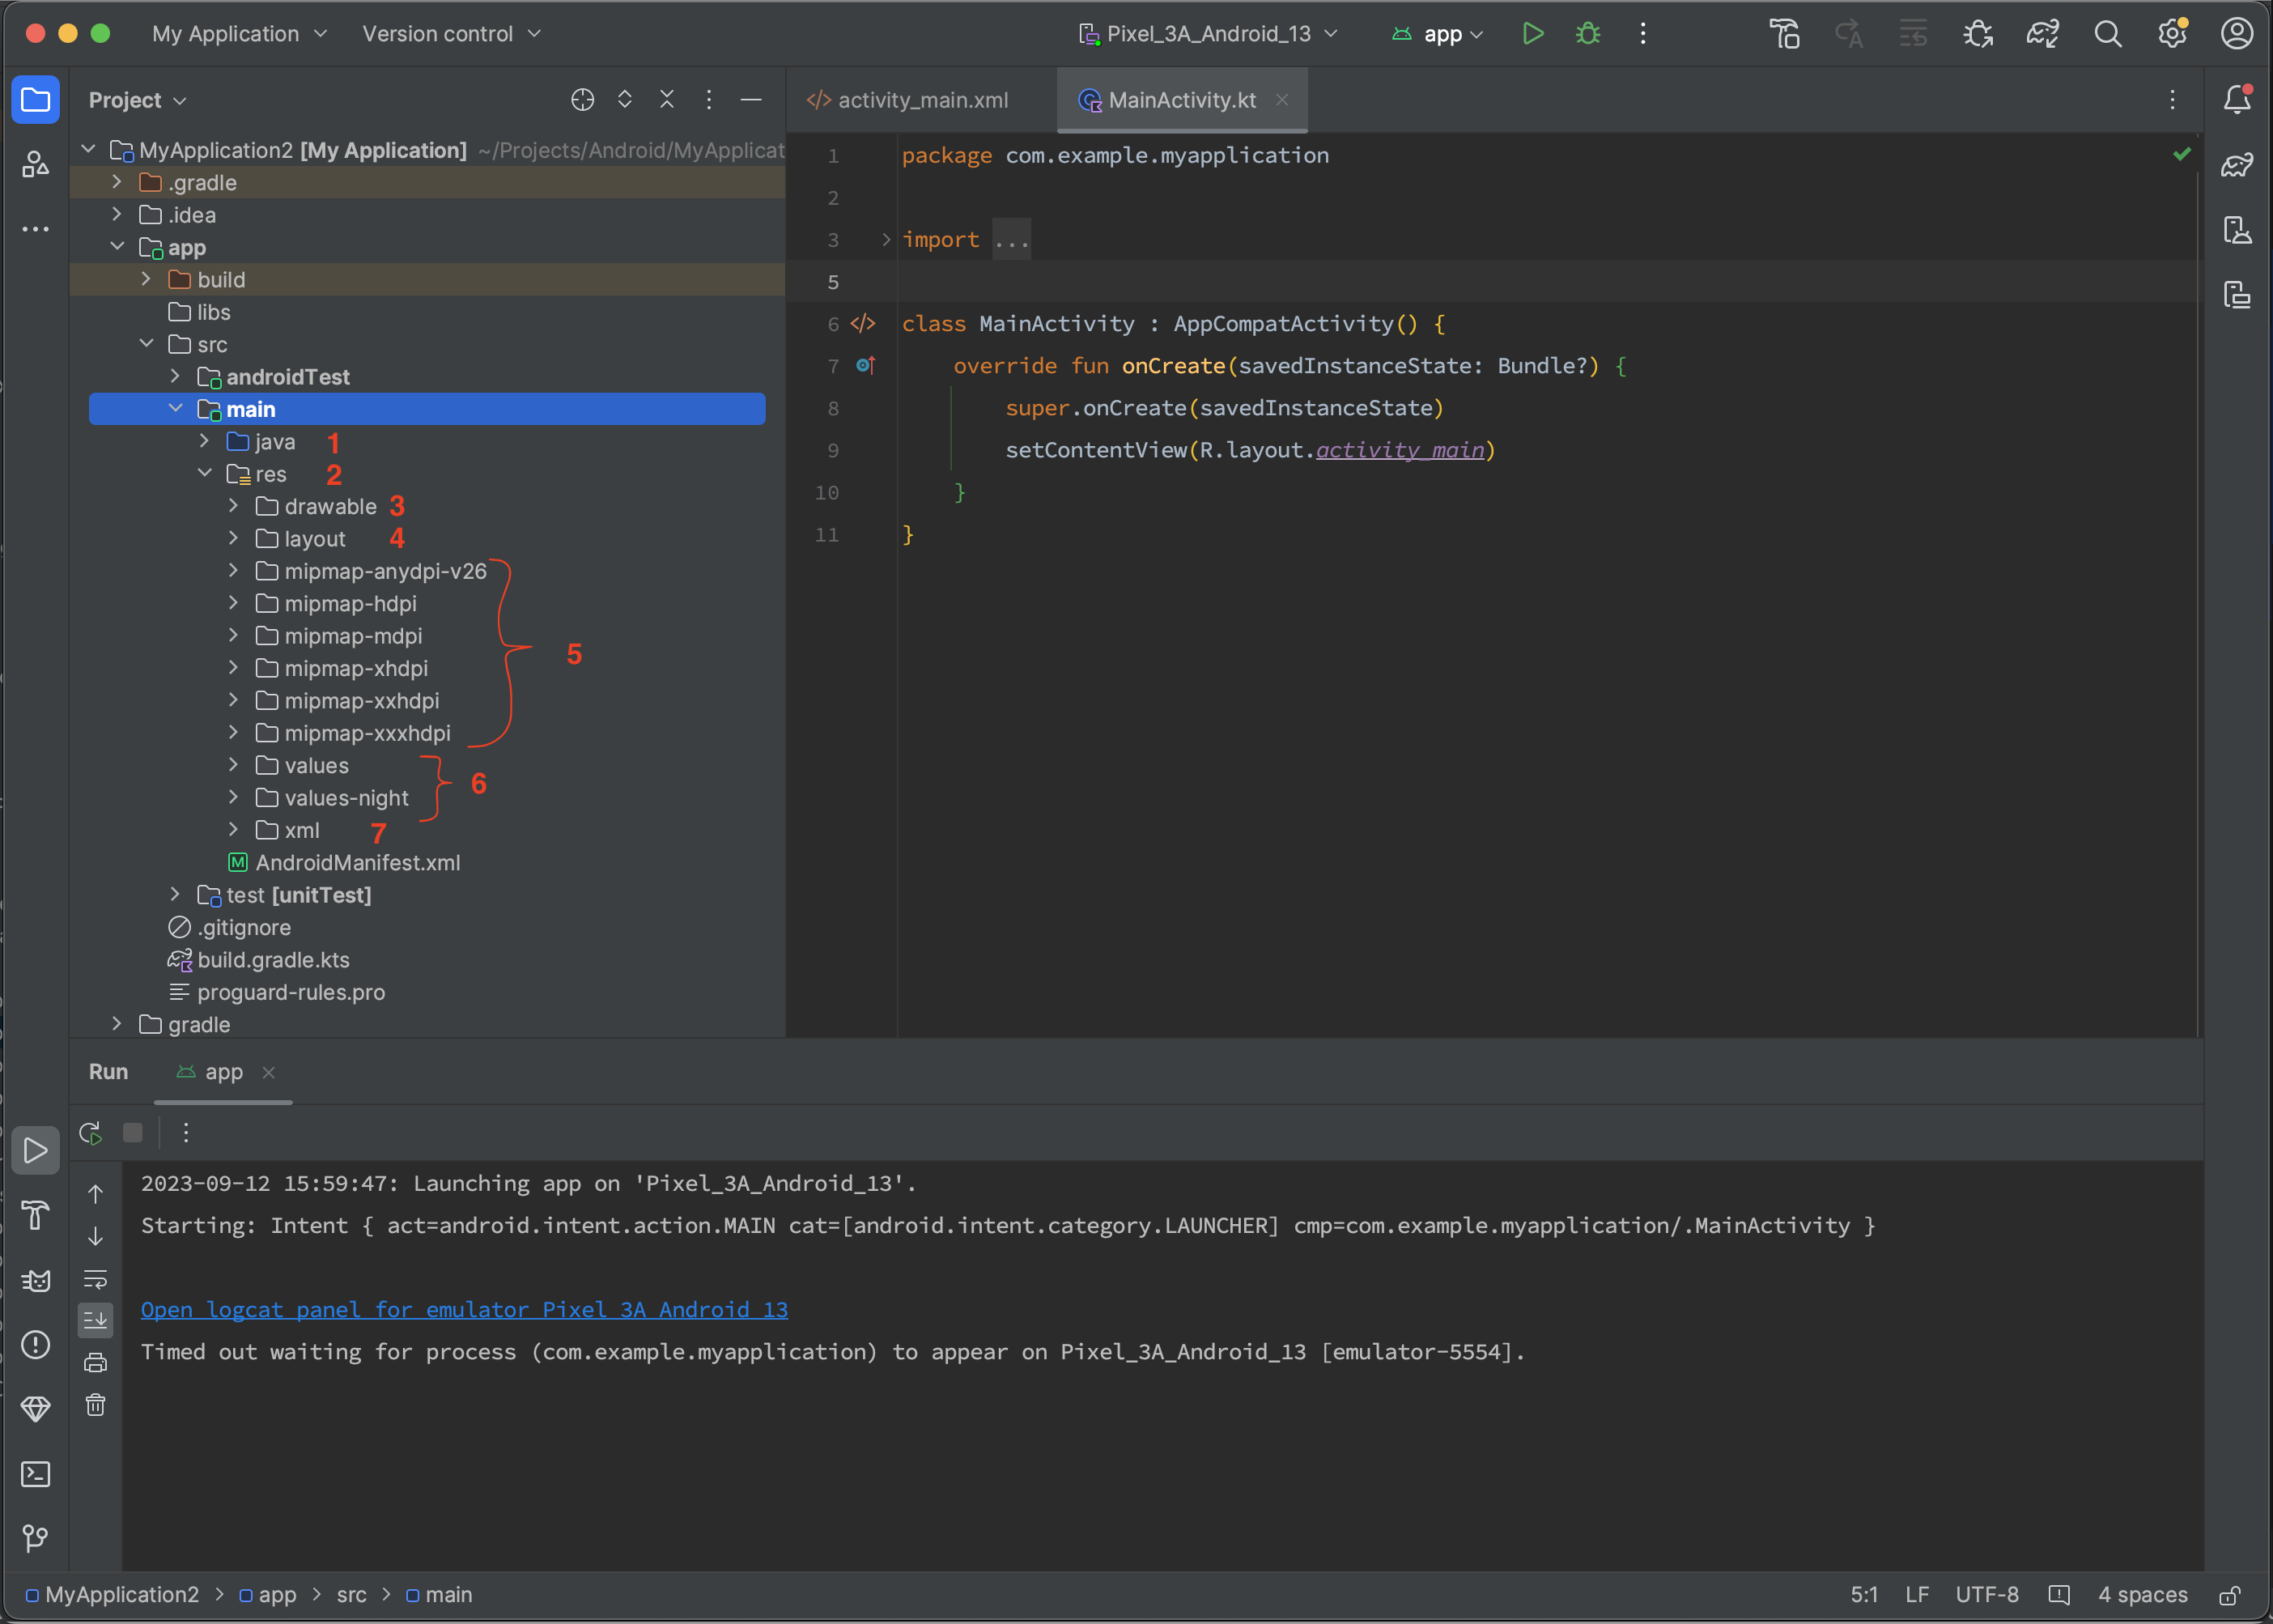
Finally, let's take a look at the folders and files inside the "main" folder. Let's see what's inside and how it's organized, as shown in the screenshot below:

Here's the breakdown:
- java - This folder stores your Kotlin / Java code.
- res - This folder contains various resources listed below.
- drawable inside the res folder - This folder contains your images, which can be in PNG format or as vector drawables defined using XML.
- layout - This folder contains the layouts for your screens. You define the elements and their arrangement on the screen using XML.
- mipmap and its variations - Each folder contains two files: a square icon and a round icon defined using XML. These icons are displayed on the Android home screen and represent your app. The variations can represent different screen sizes, Android versions, or even device languages.
- values and its variations - This folder contains various variables, such as strings, constants, and colors used in your app defined using XML. You can also set the app's theme here.
- xml - This folder is similar to the "values" folder but stores configuration files for your app, such as HTTP/HTTPS behavior, backup settings, file access permissions, and more.
That's it for now. We've quickly gone through the files and folders in our application. In the next lesson, we will create an emulator, connect a phone, and run the freshly created application.
Have a question? Ask our community in Telegram - Start-Develop RU / Start-Develop EN