Android XML: Basics of UI
Congratulations on creating your Android project! Now, let's delve into the UI development by opening the activity_main.xml file and making some interesting changes to the default "Hello World" text.
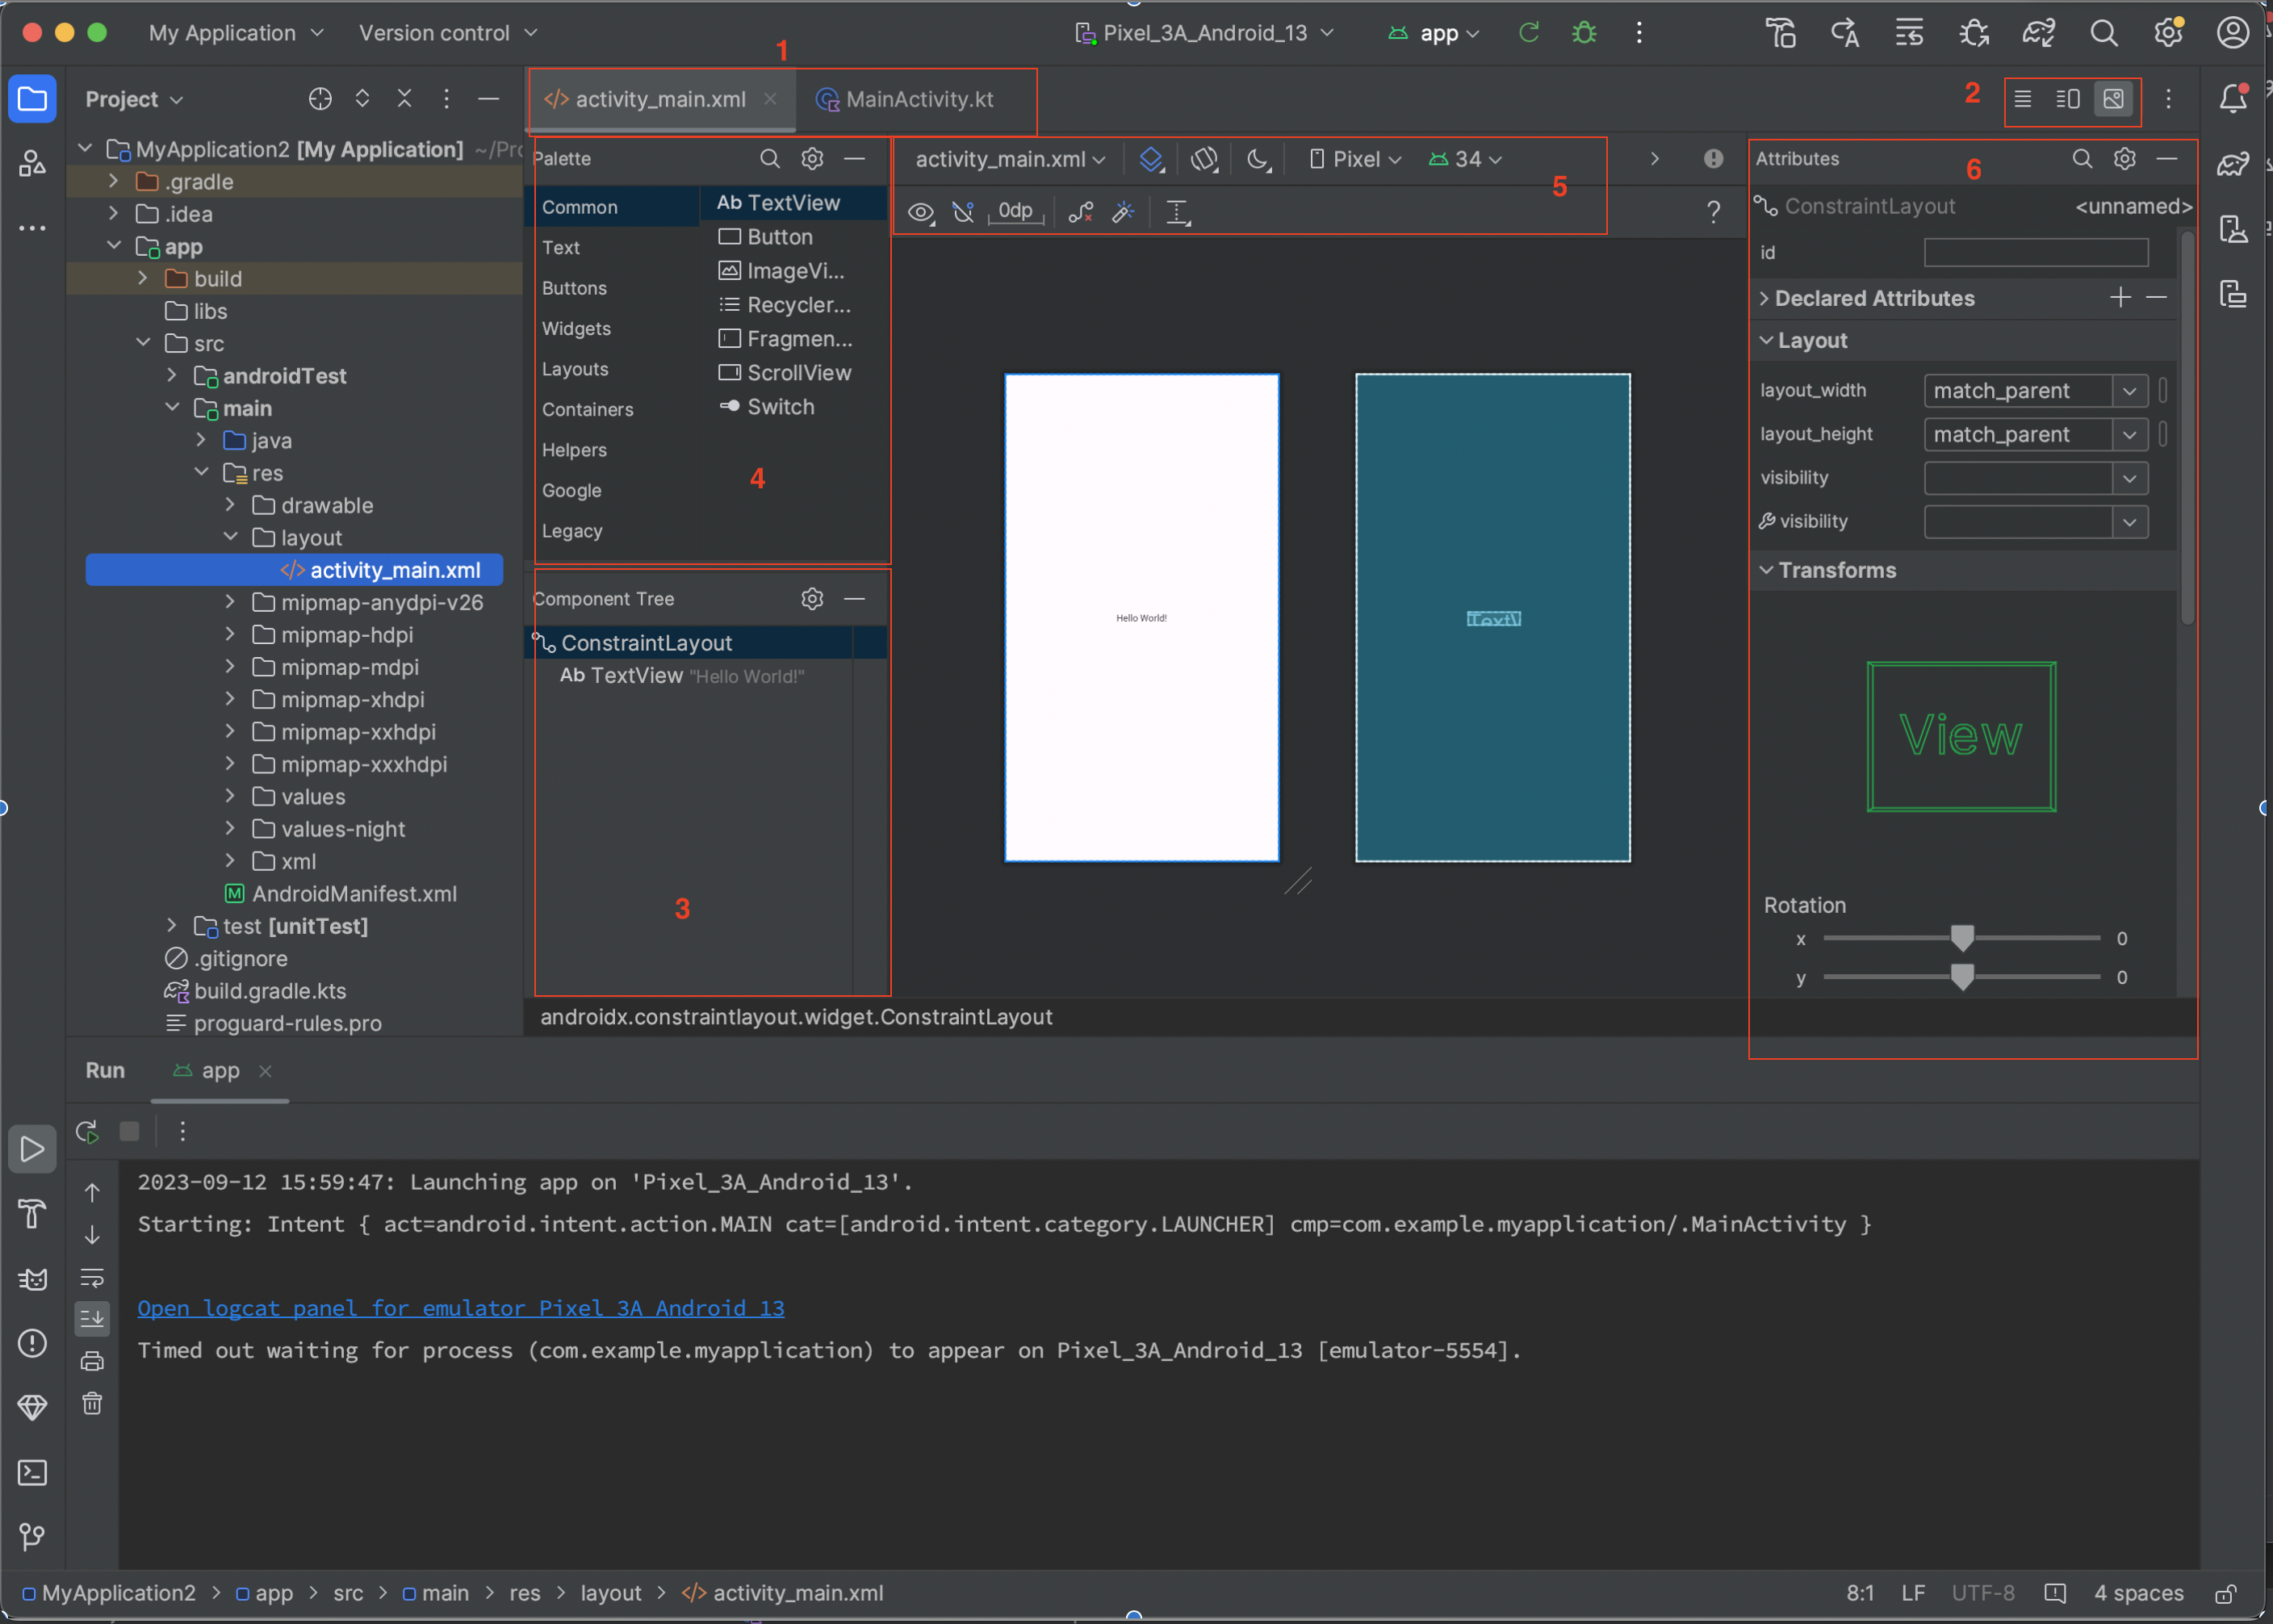
Upon opening activity_main.xml in Android Studio, you'll encounter the following components:

Let's break down what we have here:
- Open Files: MainActivity.kt (Kotlin file for screen logic) and activity_main.xml (XML layout file).
- Editing Modes: XML Text Editor, XML Text Editor with Preview, Visual Editor (recommended for preview).
- Screen Structure: Displays the current screen structure with elements like ConstraintLayout and TextView.
- Layouts and Views: Lists available layouts/containers and views.
- Preview Settings: Customize phone orientation, theme, Android version, and device type.
- Element Properties: Modify properties of the selected element (e.g., TextView's text parameter).
Switch to the "XML Text Editor with Preview" mode (middle button in item 2) to see the XML code:
<?xml version="1.0" encoding="utf-8"?>
<androidx.constraintlayout.widget.ConstraintLayout xmlns:android="http://schemas.android.com/apk/res/android"
    xmlns:app="http://schemas.android.com/apk/res-auto"
    xmlns:tools="http://schemas.android.com/tools"
    android:layout_width="match_parent"
    android:layout_height="match_parent"
    tools:context=".MainActivity">

    <TextView
        android:layout_width="wrap_content"
        android:layout_height="wrap_content"
        android:text="Hello World!"
        app:layout_constraintBottom_toBottomOf="parent"
        app:layout_constraintEnd_toEndOf="parent"
        app:layout_constraintStart_toStartOf="parent"
        app:layout_constraintTop_toTopOf="parent" />

</androidx.constraintlayout.widget.ConstraintLayout>
The first line catches our attention:
<?xml version="1.0" encoding="utf-8"?>This is the header of all XML files in Android. It specifies the XML version and text encoding. You don't need to worry about it; just remember that all Android XML files will have this header.
Next, we see our screen layout. Specifically, it's a ConstraintLayout containing a TextView, where:
- ConstraintLayout is a container, i.e., an element that contains other elements. Its task is to contain and position elements depending on the element's settings.
- TextView is our view, i.e., an element that displays something. There aren't many basic elements in Android, and we'll cover them in this course.
We see that the container contains other elements. However, a view CANNOT contain other elements. This is important to remember!
If we want to change something on the screen, we need to edit the XML file. This can be done using the visual editor or the text editor. I prefer the second option because I can show what and how to change. To change the "Hello World!" text on the screen, we need to replace the android:text attribute value in the TextView element from "Hello World!" to, for example, "Start Develop":
android:text="Hello World!"Replace with:
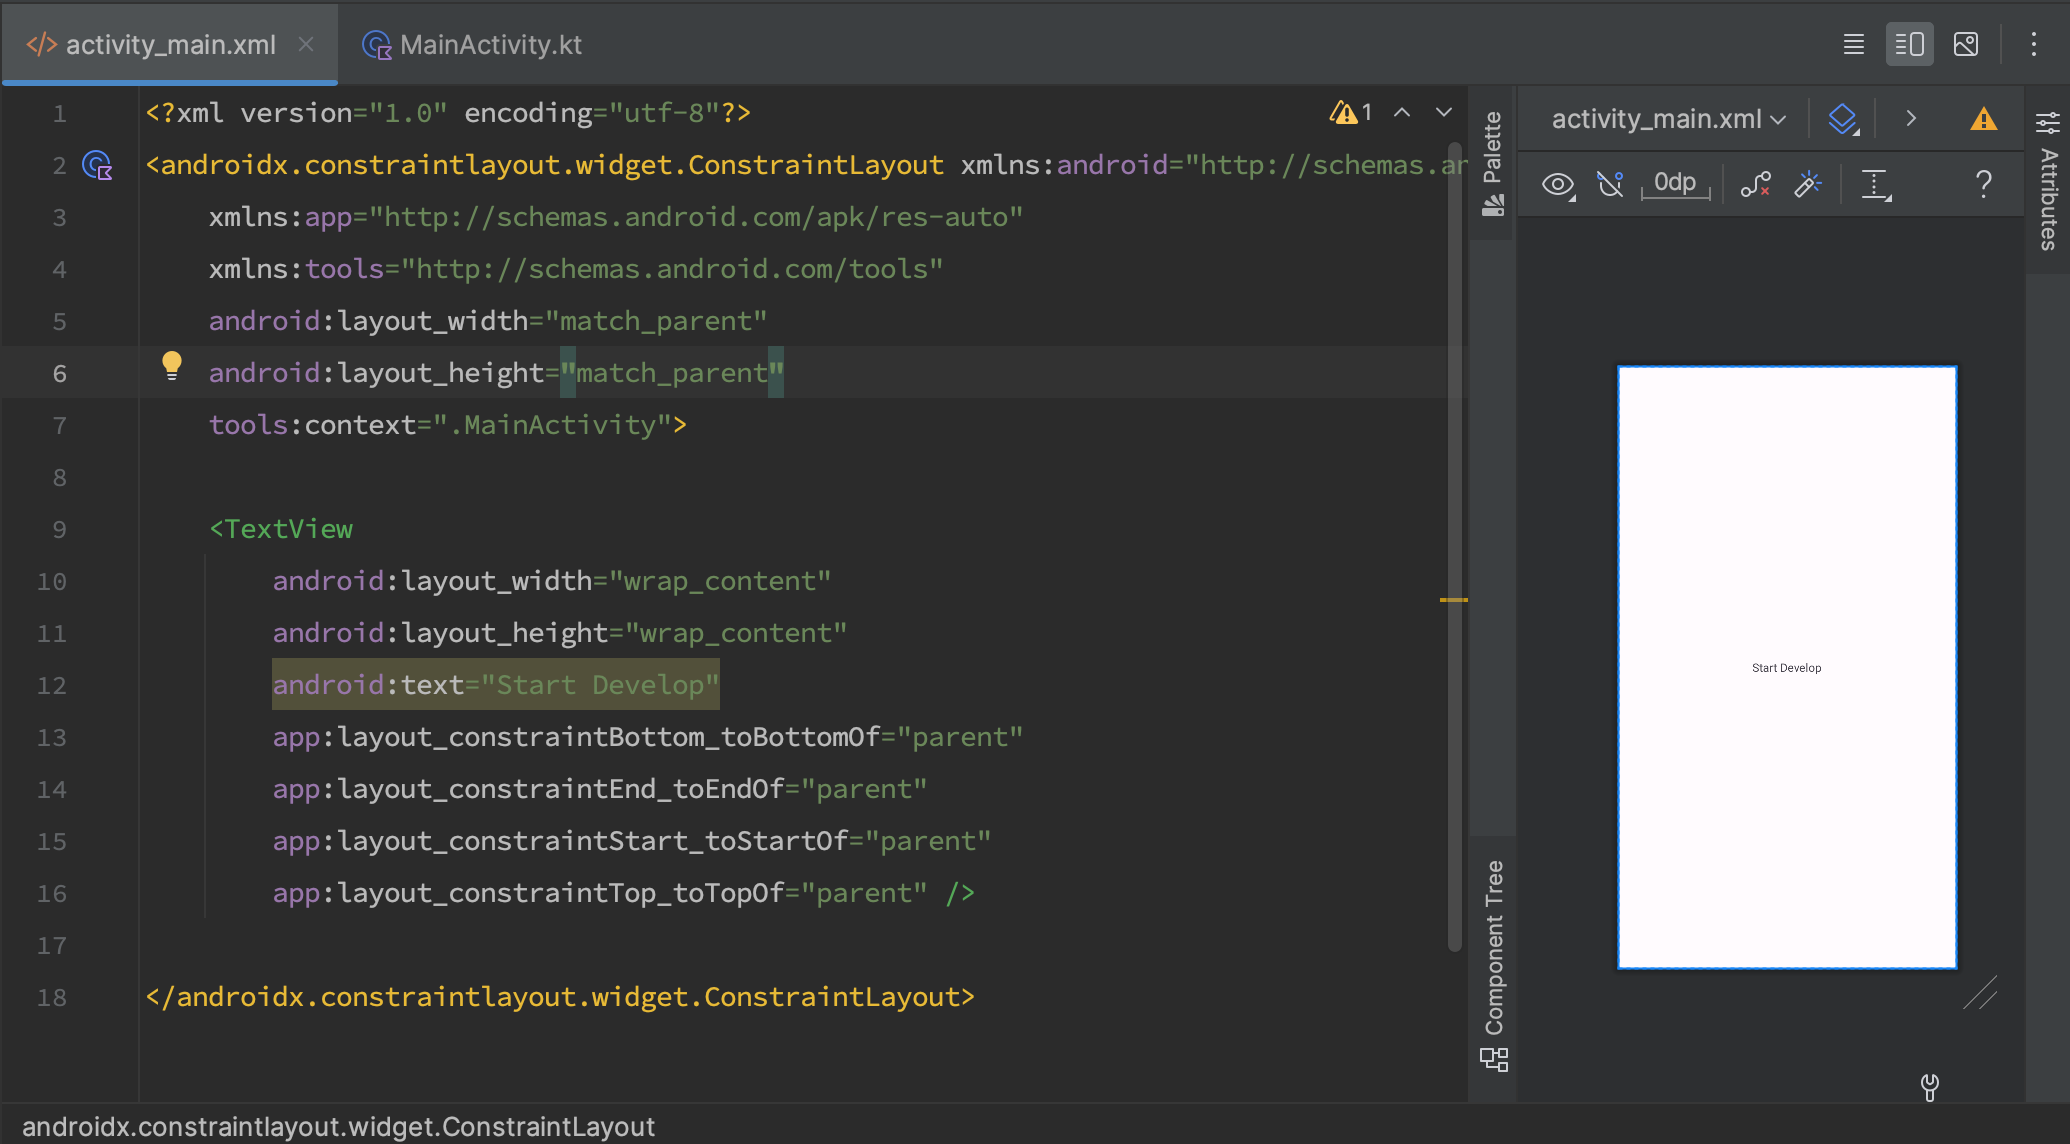
android:text="Start Develop"And we see the following result:

We changed the XML and saw that the preview for our screen changed. Let's go through the basic XML attributes that all elements, both View and containers, have:
- android:id: A unique identifier for the element, used to refer to the element from code or other resources.
- android:layout_width and android:layout_height: Determine the width and height of the element, respectively. They can take values such as "wrap_content," "match_parent," or specific sizes in pixels (250px) or abstract units (250dp).
- android:layout_gravity and android:gravity: Define the alignment of the element in the parent container and the alignment of text inside the element, respectively.
- android:layout_margin: Defines margins around the element.
- android:padding: Defines margins inside the element.
- android:background: Applies a backgrund for the element
You may have noticed that attributes have prefixes:
- android:: This means that the attribute is system-defined. It is declared by the system itself and is used by the Android device.
- app:: This attribute is used by your application. It is declared in your application and/or the library you connected and is used specifically by your application/library.
- tools:: This is an attribute declared and used by Android Studio. It is mainly used for development purposes, displaying text and other elements in the preview. Only in the preview, not in the actual application.
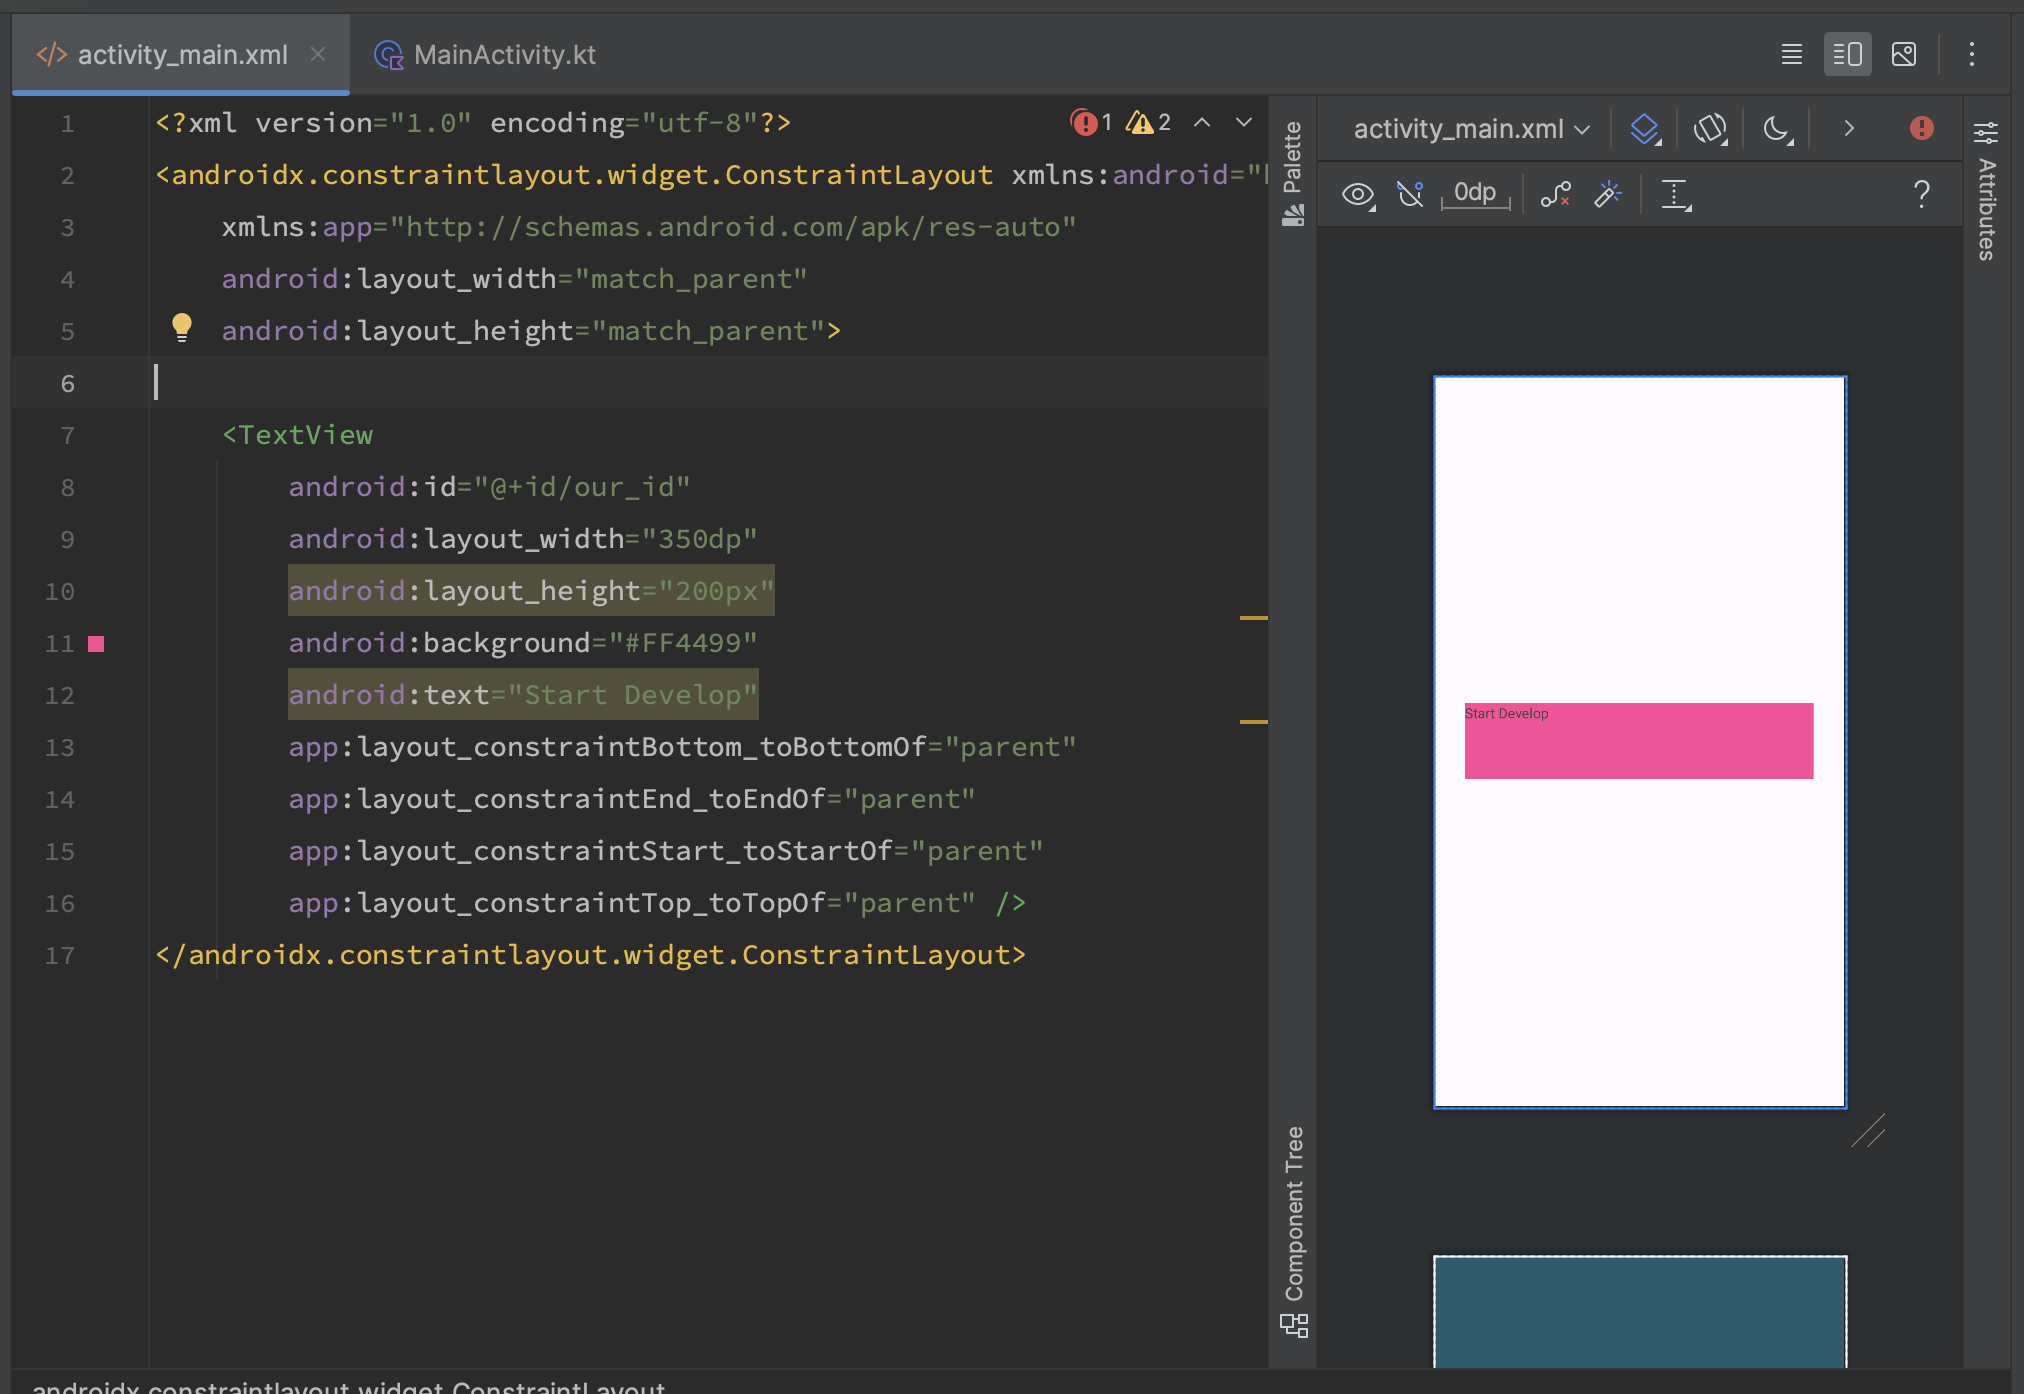
Let's play around and add a couple of attributes to our TextView to see how they work. We'll do the following:
- Set an ID with the value "our_id."
- Set a background with the color #FF4499.
- Set the height to 200 pixels.
- Set the width to 350 units.
And we see the following result:

You may have noticed that Android Studio highlighted the height attribute in pixels. In Android, DP is almost always used for element sizes. 1 DP is not equal to 1 PX. This unit is calculated by the system itself. These size units allow for a very similar design of the same layout on different screen sizes. Just remember that ELEMENT SIZES ARE SPECIFIED USING DP.
We covered the basics of UI development using XML. In the next lesson, we will get more acquainted with the TextView element. Now you can run the program and see how it will look.
Have a question? Ask our community in Telegram - Start-Develop RU / Start-Develop EN