Android XML: Arrangement of elements. LinearLayout
In this lesson, we will cover the basic theory of element placement and explore LinearLayout in action. Layout - is a container where we place our elements. I can use 2 designations as a container, as well as Layout
In modern Android development, there are 2 main basic and very important containers:
- LinearLayout - as the name suggests, this is a container that arranges elements in a row, either vertically or horizontally.
- ConstraintLayout - is a container that arranges elements relative to constraints.
And a few more additional ones:
- TableLayout - a container that arranges static elements in a table, depending on settings - how many columns and rows in the table.
- ScrollView and HorizontalScrollView - containers for horizontal and vertical scrolling of one large static element that is larger than the screen in size!
- RecyclerView / ListView / GridView - Not exactly containers in their essence, but they are designed to place dynamic lists that are built not from XML but from Java / Kotlin code. For example, a list of chats or messages in Instagram / Telegram.
- CoordinatorLayout - Its main design is animations, not just layout. All these smooth interactions, when you scroll the content and something appears or disappears somewhere, are done using this container. All interactions are implemented using CoordinatorLayout.Behavior.
To understand how to place elements in containers, we need to understand how to set the size of all elements. To set the size, we need to interact with the android:layout_width and android:layout_height attributes, which can take the following values:
- A fixed value specified in dp units, for example, 100dp, 34dp, or even 570dp, and so on.
- match_parent - instructs the element to occupy all available space. This is why the width and height (android:layout_width and android:layout_height) of the root LinearLayout have the value match_parent. In other words, make the width and height the same as the size of the entire screen on the device.
- wrap_content - instructs the element to take up exactly as much space as is needed for the content + internal padding, or in the case of the last element, as much space as remains in the container in which the element is located. This is what we see in the screenshot above - the buttons contain text + some space, which can be removed by adding the android:padding="0dp" attribute. This is exactly what we did in the previous lesson.
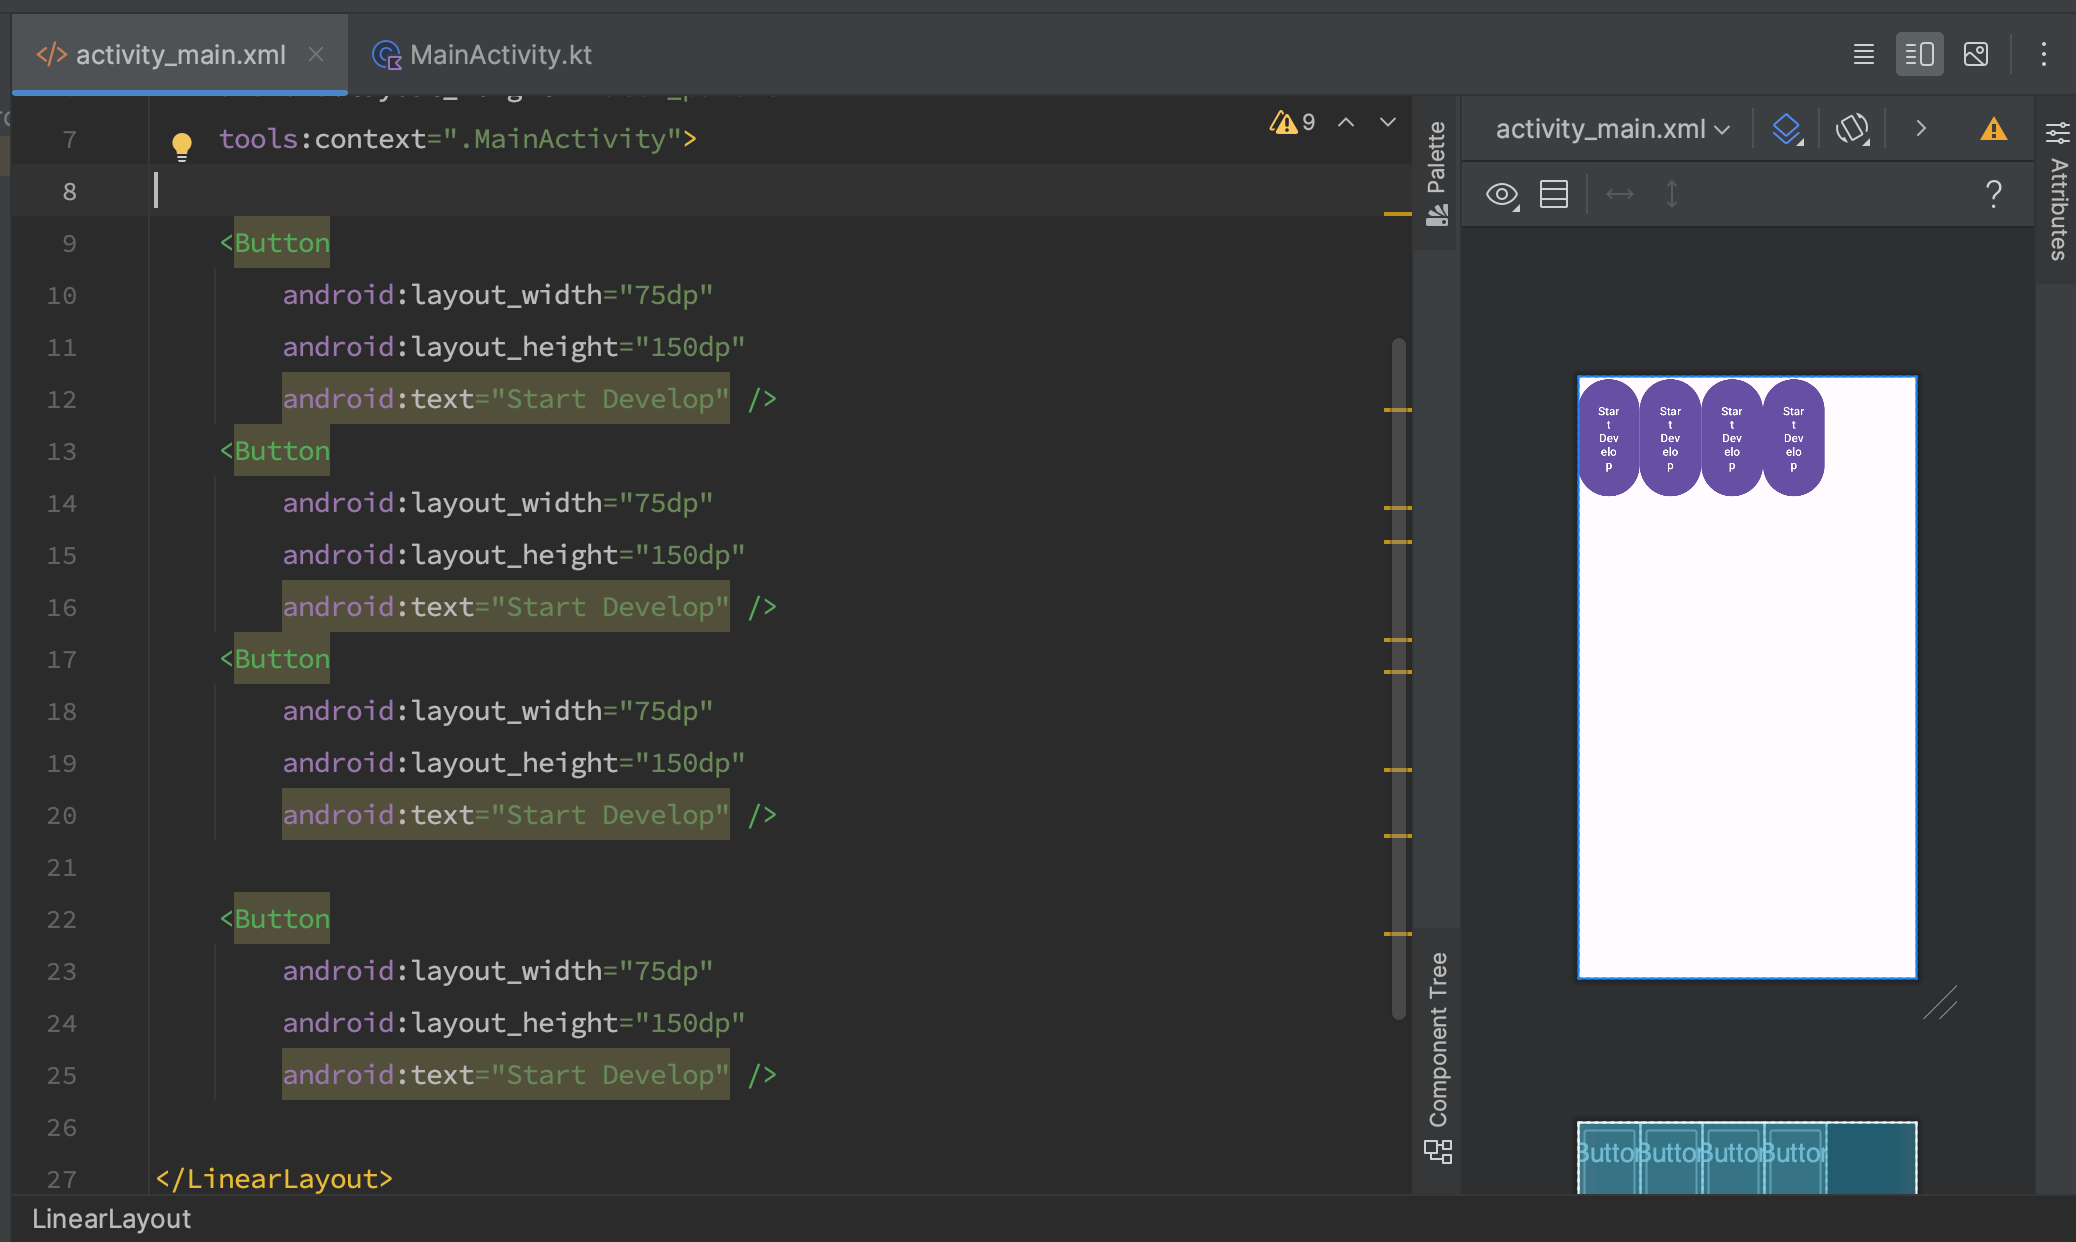
So, let's consider it in order. In our created application, inside activity_main.xml, we saw that we have a root tag ConstraintLayout inside which our TextView/Button is already located. Let's modify our activity_main.xml as follows so that we have a root element LinearLayout and the nested elements have a fixed size. Let's set the values for our buttons - width - 75dp and height - 50dp, respectively, by setting the attributes android:layout_width="75dp" and android:layout_height="150dp"
Example code:
<?xml version="1.0" encoding="utf-8"?>
<LinearLayout xmlns:android="http://schemas.android.com/apk/res/android"
    xmlns:app="http://schemas.android.com/apk/res-auto"
    xmlns:tools="http://schemas.android.com/tools"
    android:layout_width="match_parent"
    android:layout_height="match_parent"
    tools:context=".MainActivity">

    <Button
        android:layout_width="75dp"
        android:layout_height="150dp"
        android:text="Start Develop" />
    <Button
        android:layout_width="75dp"
        android:layout_height="150dp"
        android:text="Start Develop" />
    <Button
        android:layout_width="75dp"
        android:layout_height="150dp"
        android:text="Start Develop" />

    <Button
        android:layout_width="75dp"
        android:layout_height="150dp"
        android:text="Start Develop" />

</LinearLayout>
The result looks like this:

It doesn't look nice. But at this point, the most important thing for us is to understand how size adjustment works for all Views. You can try setting different sizes for the buttons. For example, values from 100 to 300 dp, and see how it changes.
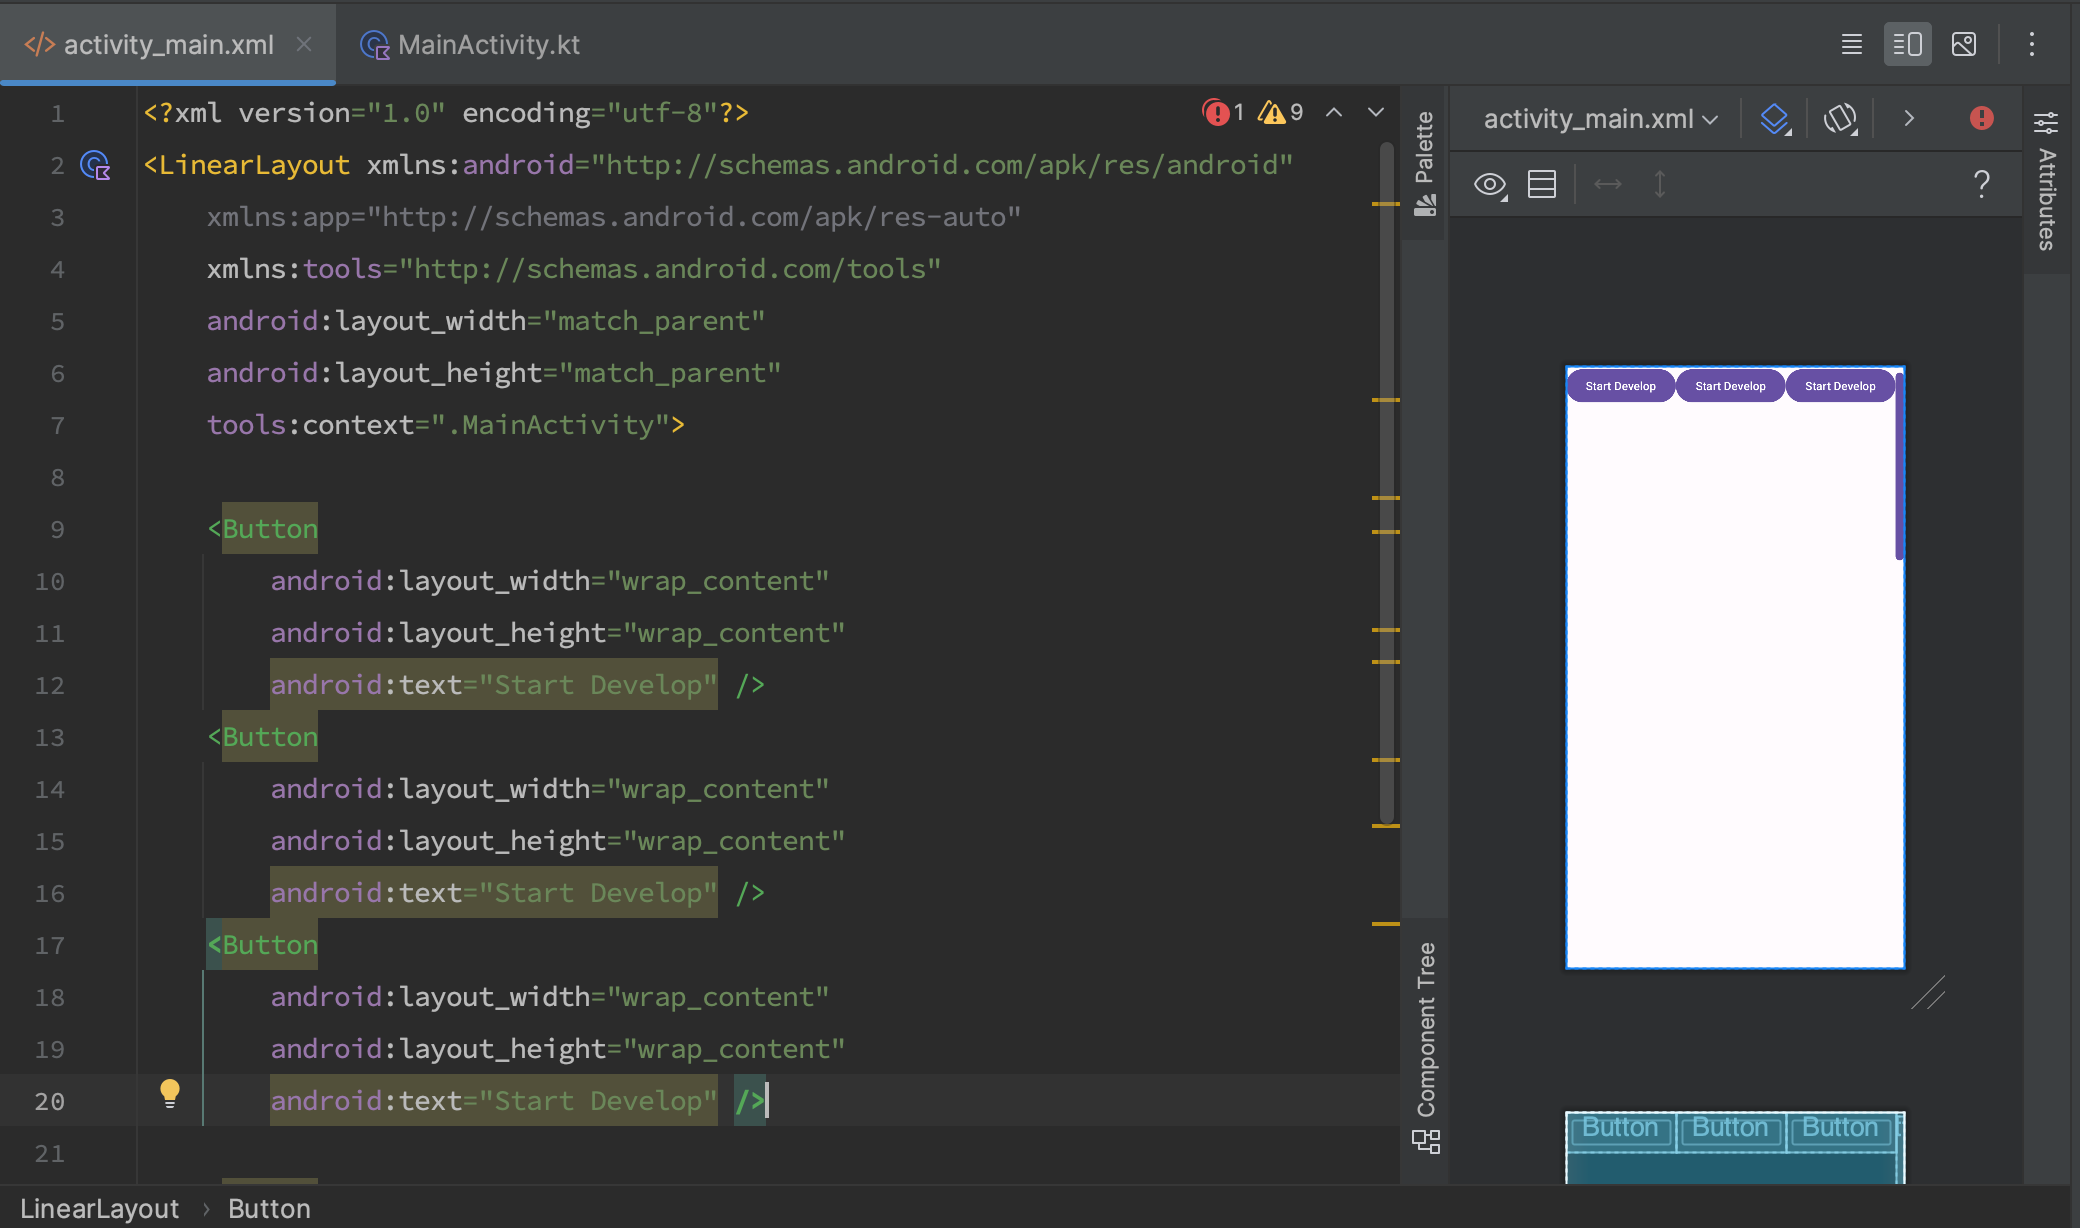
What will happen if we set the size as wrap_content for all buttons - ask the buttons to take up as much space as they need for the text:
<?xml version="1.0" encoding="utf-8"?>
<LinearLayout xmlns:android="http://schemas.android.com/apk/res/android"
    xmlns:app="http://schemas.android.com/apk/res-auto"
    xmlns:tools="http://schemas.android.com/tools"
    android:layout_width="match_parent"
    android:layout_height="match_parent"
    tools:context=".MainActivity">

    <Button
        android:layout_width="wrap_content"
        android:layout_height="wrap_content"
        android:text="Start Develop" />
    <Button
        android:layout_width="wrap_content"
        android:layout_height="wrap_content"
        android:text="Start Develop" />
    <Button
        android:layout_width="wrap_content"
        android:layout_height="wrap_content"
        android:text="Start Develop" />

    <Button
        android:layout_width="wrap_content"
        android:layout_height="wrap_content"
        android:text="Start Develop" />

</LinearLayout>
We will see the following result:

By default, LinearLayout arranges elements horizontally, and yes, the last element did not fit on the screen. LinearLayout can handle such things, but at the cost of changing the size of internal elements. To do this, we need to set the android:layout_weight="1" attribute for our Buttons. It's important to understand that the value in the attribute is not as crucial as the values in all elements. In other words, if all elements have android:layout_weight="1", then LinearLayout will give all elements the same size. Accordingly, if different values are given, LinearLayout will calculate the size for each.
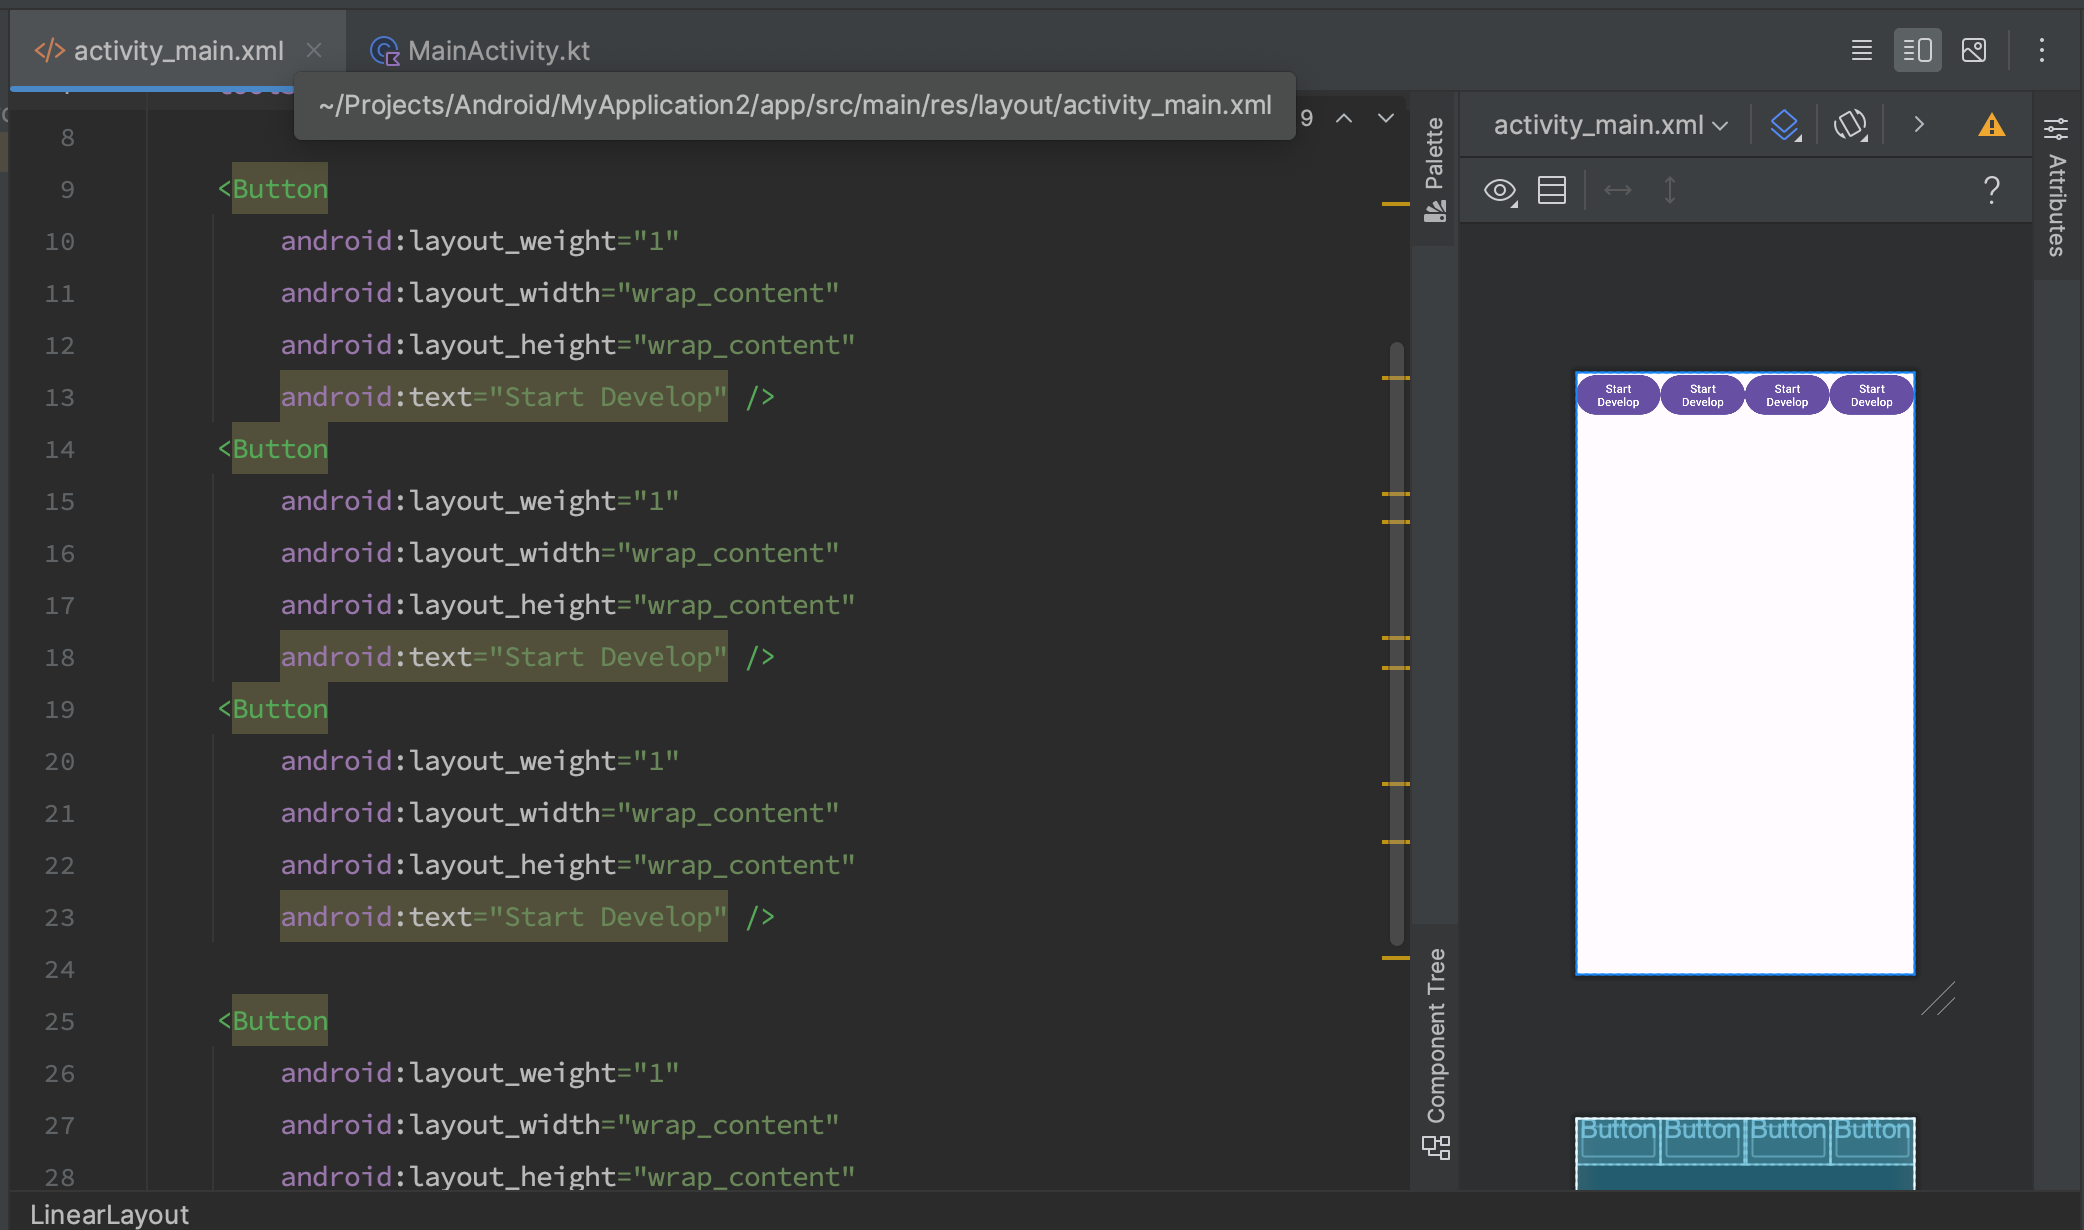
So, we add the android:layout_weight="1" attribute to each element and see the following result:

LinearLayout calculated and set the width for each element. However, the text inside the button did not fit. Therefore, there was a line break, and as a result, the height increased to accommodate the content + padding since it is set as wrap_content - as much as the content requires.
IMPORTANT! There is a nuance here - the android:layout_weight attribute works in the direction (width or height) in which LinearLayout arranges elements. It was mentioned earlier that by default, LinearLayout arranges elements horizontally. This is why the width for the buttons was calculated by the container! And the height of the buttons was calculated by the buttons themselves!
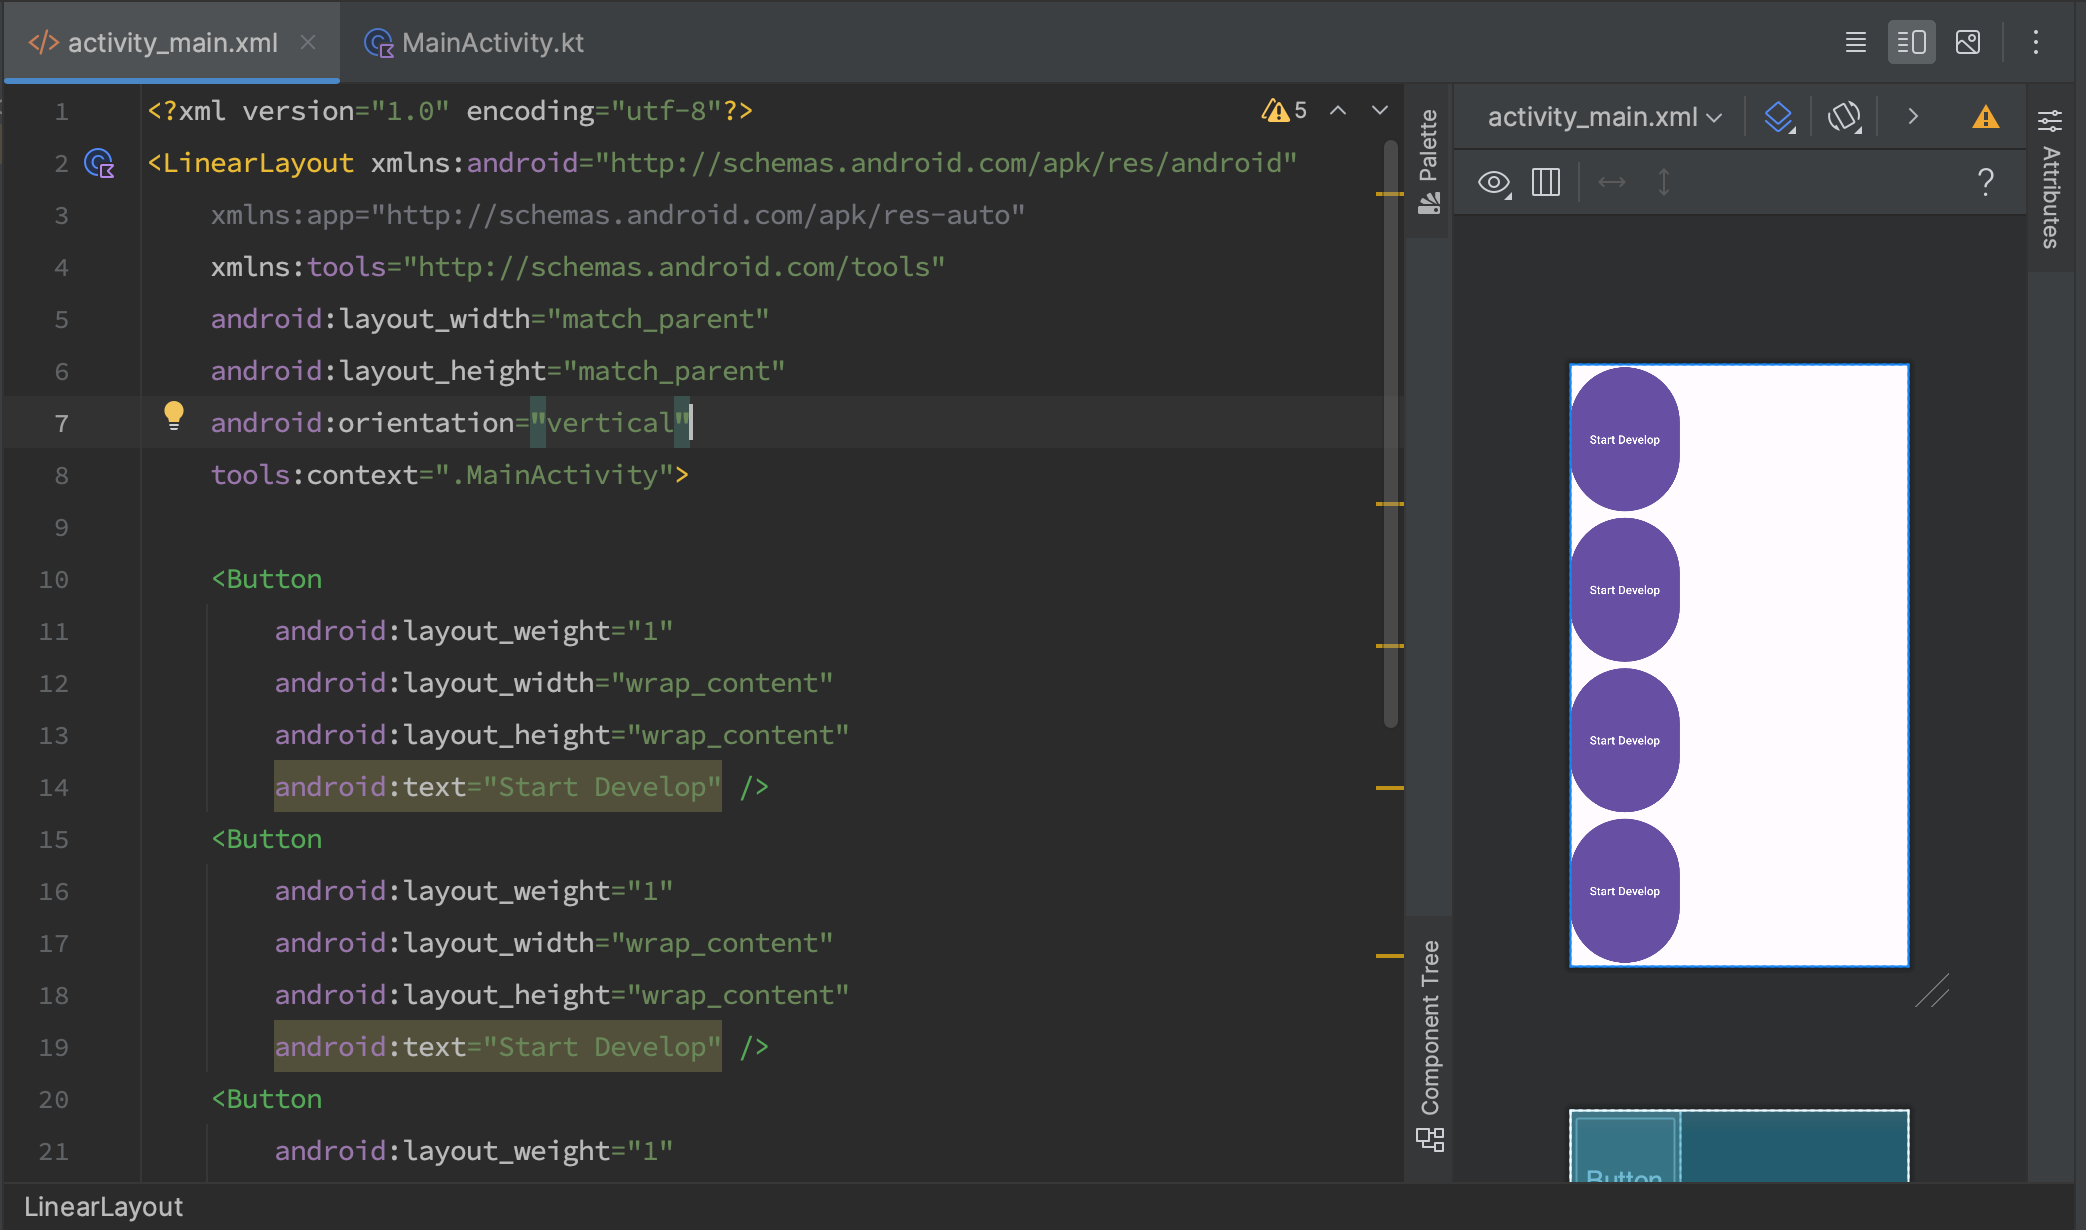
Let's ask LinearLayout to arrange the elements vertically while leaving layout_weight for the elements and simply add the android:orientation="vertical" attribute to our LinearLayout.
Here is the result:

As described above, LinearLayout calculated and set the height for each button. That is, the android:layout_width="wrap_content" attribute for height was ignored and overwritten. Since all buttons have the same weight value, all buttons have the same height to fill the entire screen.
Have a question? Ask our community in Telegram - Start-Develop RU / Start-Develop EN