Create Android Emulator (AVD). Connect device for development. Launch the app
In the previous lesson, we created a project. In this lesson, we will create an emulator (a virtual phone on our computer), connect a real phone to the computer in developer mode, and even run our created project.
If you have a weak computer, using an emulator may not be comfortable or even possible. In that case, you will need to use a real phone for development. So, you can skip the emulator creation step and proceed directly to connecting the phone in developer mode.
To create an emulator - a virtual Android device, we need to follow these steps as shown in the screenshot:
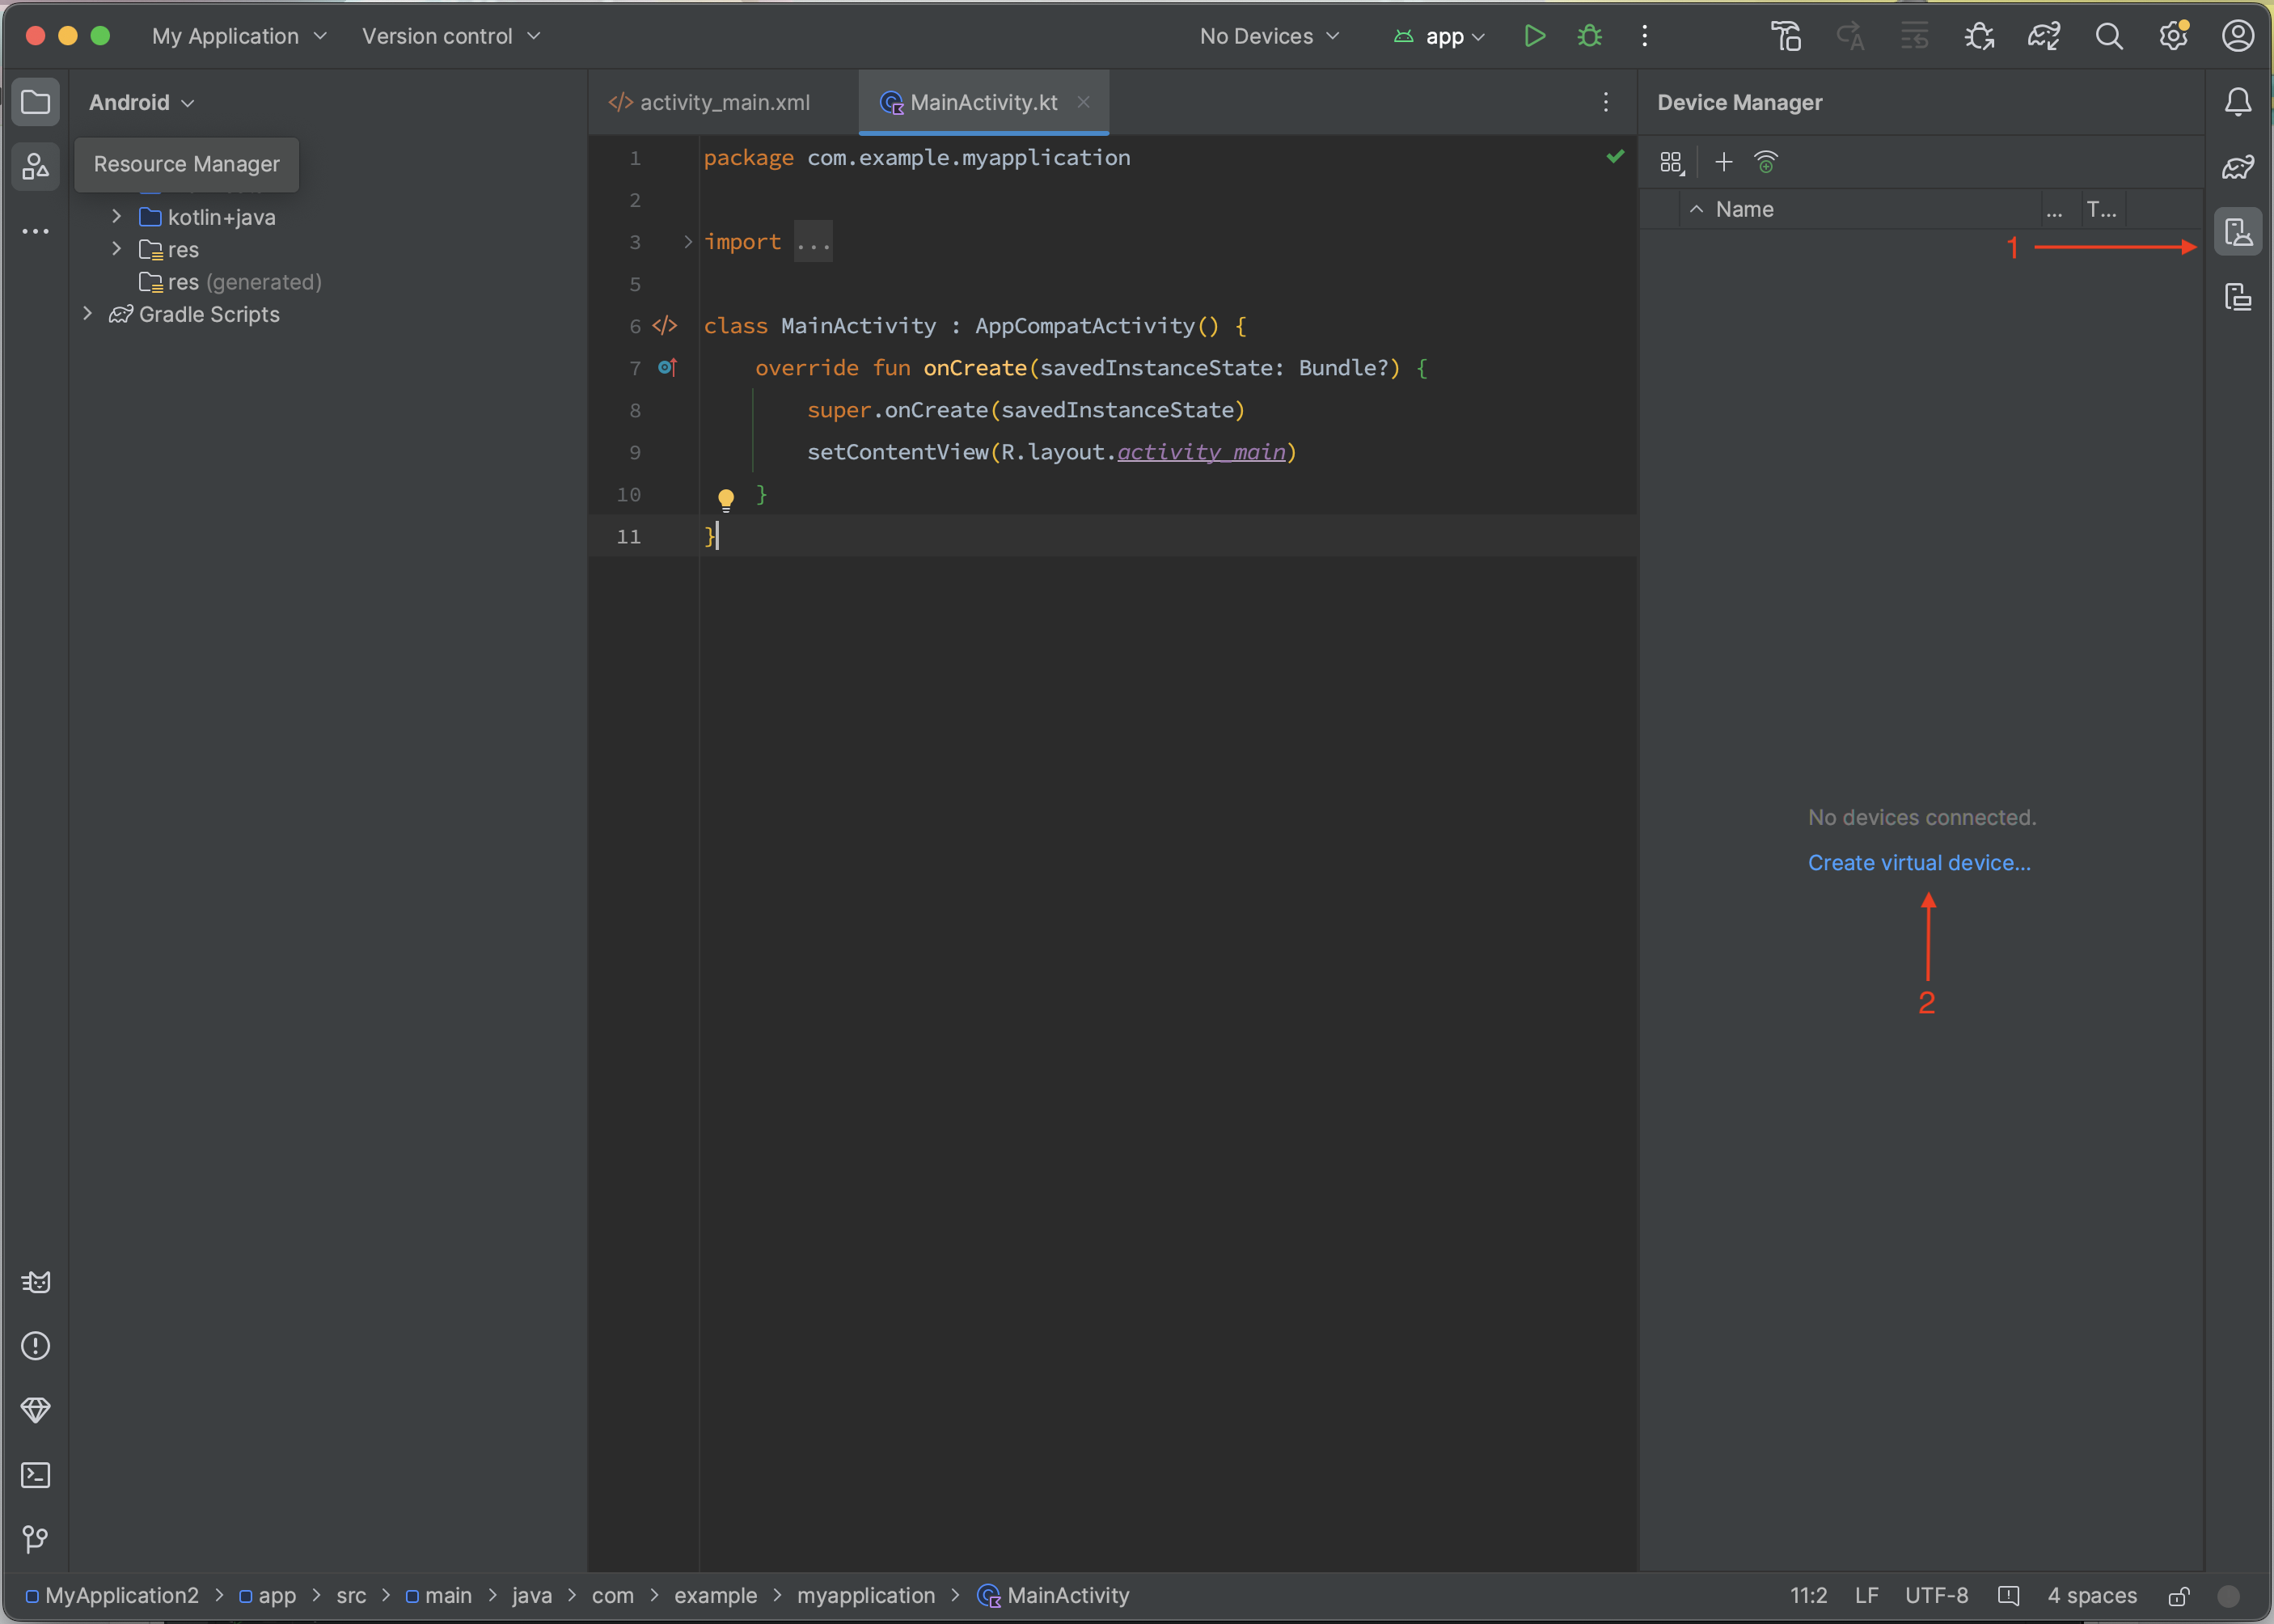
- Device window with all connected devices. This displays all our connected devices and emulators. Currently, we have none, so the list is empty.
- The button to create new emulator
Now, to create a new emulator, press button 2 and you'll see the following window:
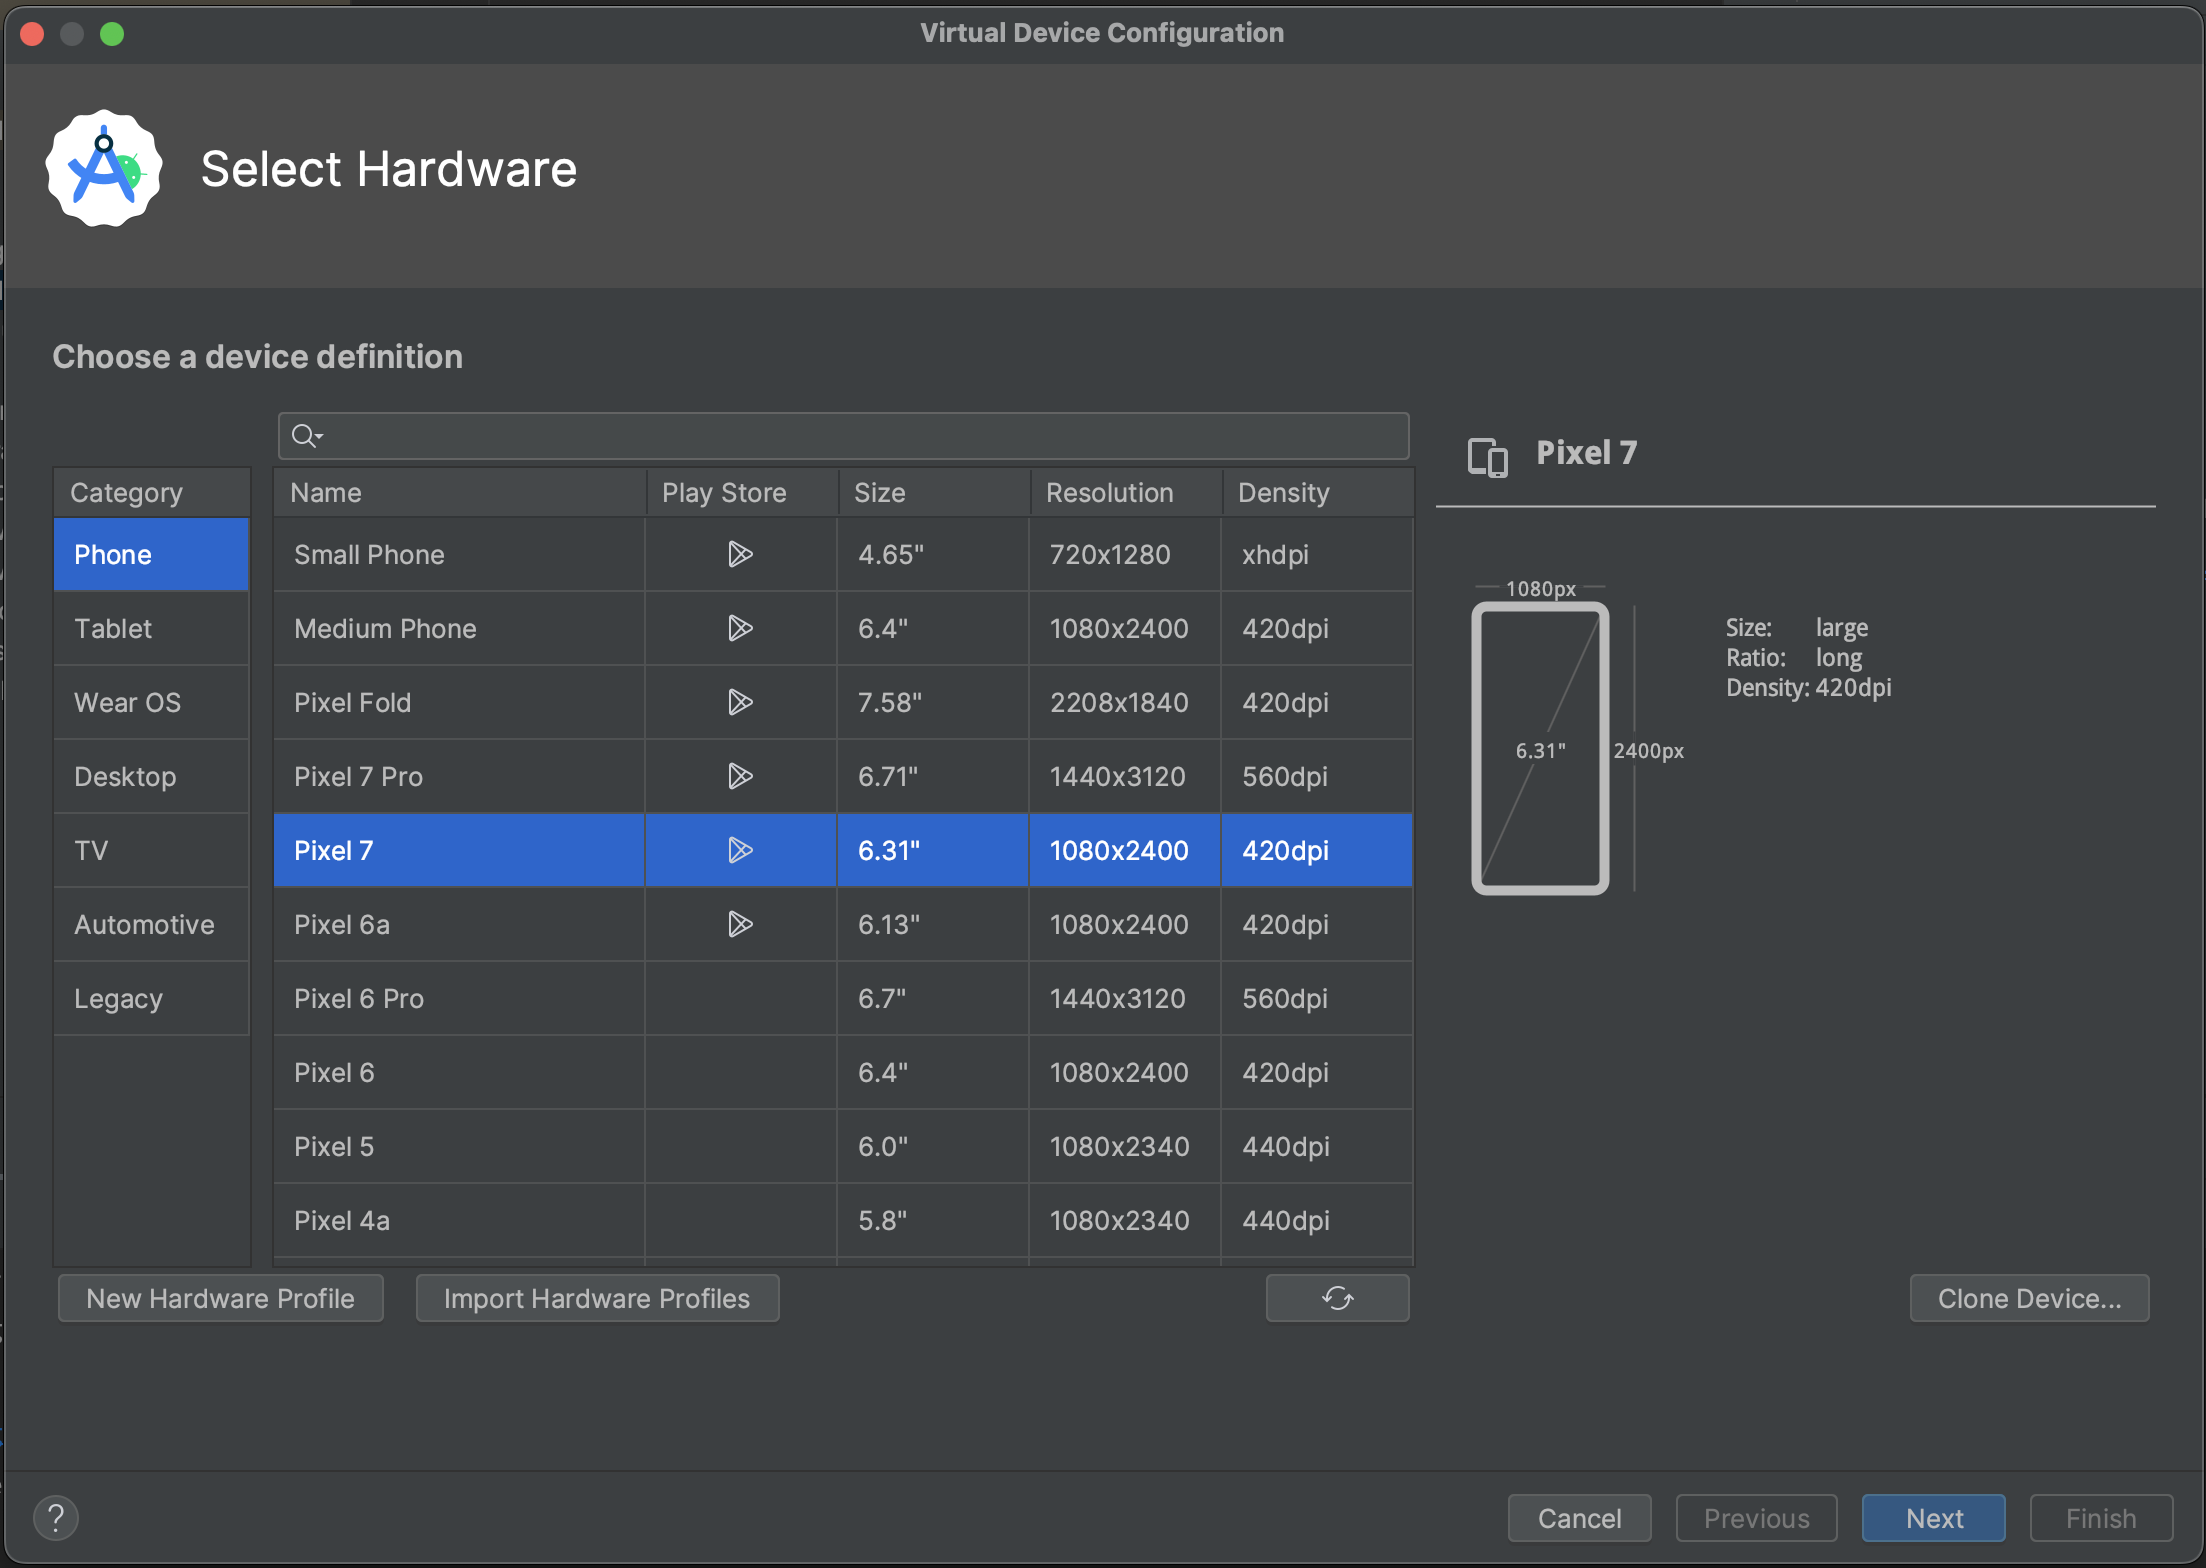
Here, you need to select the device you want to use. You can choose any device, but make sure it has the Play Store icon in the column. This means the emulator will support Google services, including Push notifications, Google Maps, Firebase, and so on.
After selecting the device and clicking the Next button, you'll see the screen for selecting the Android version:
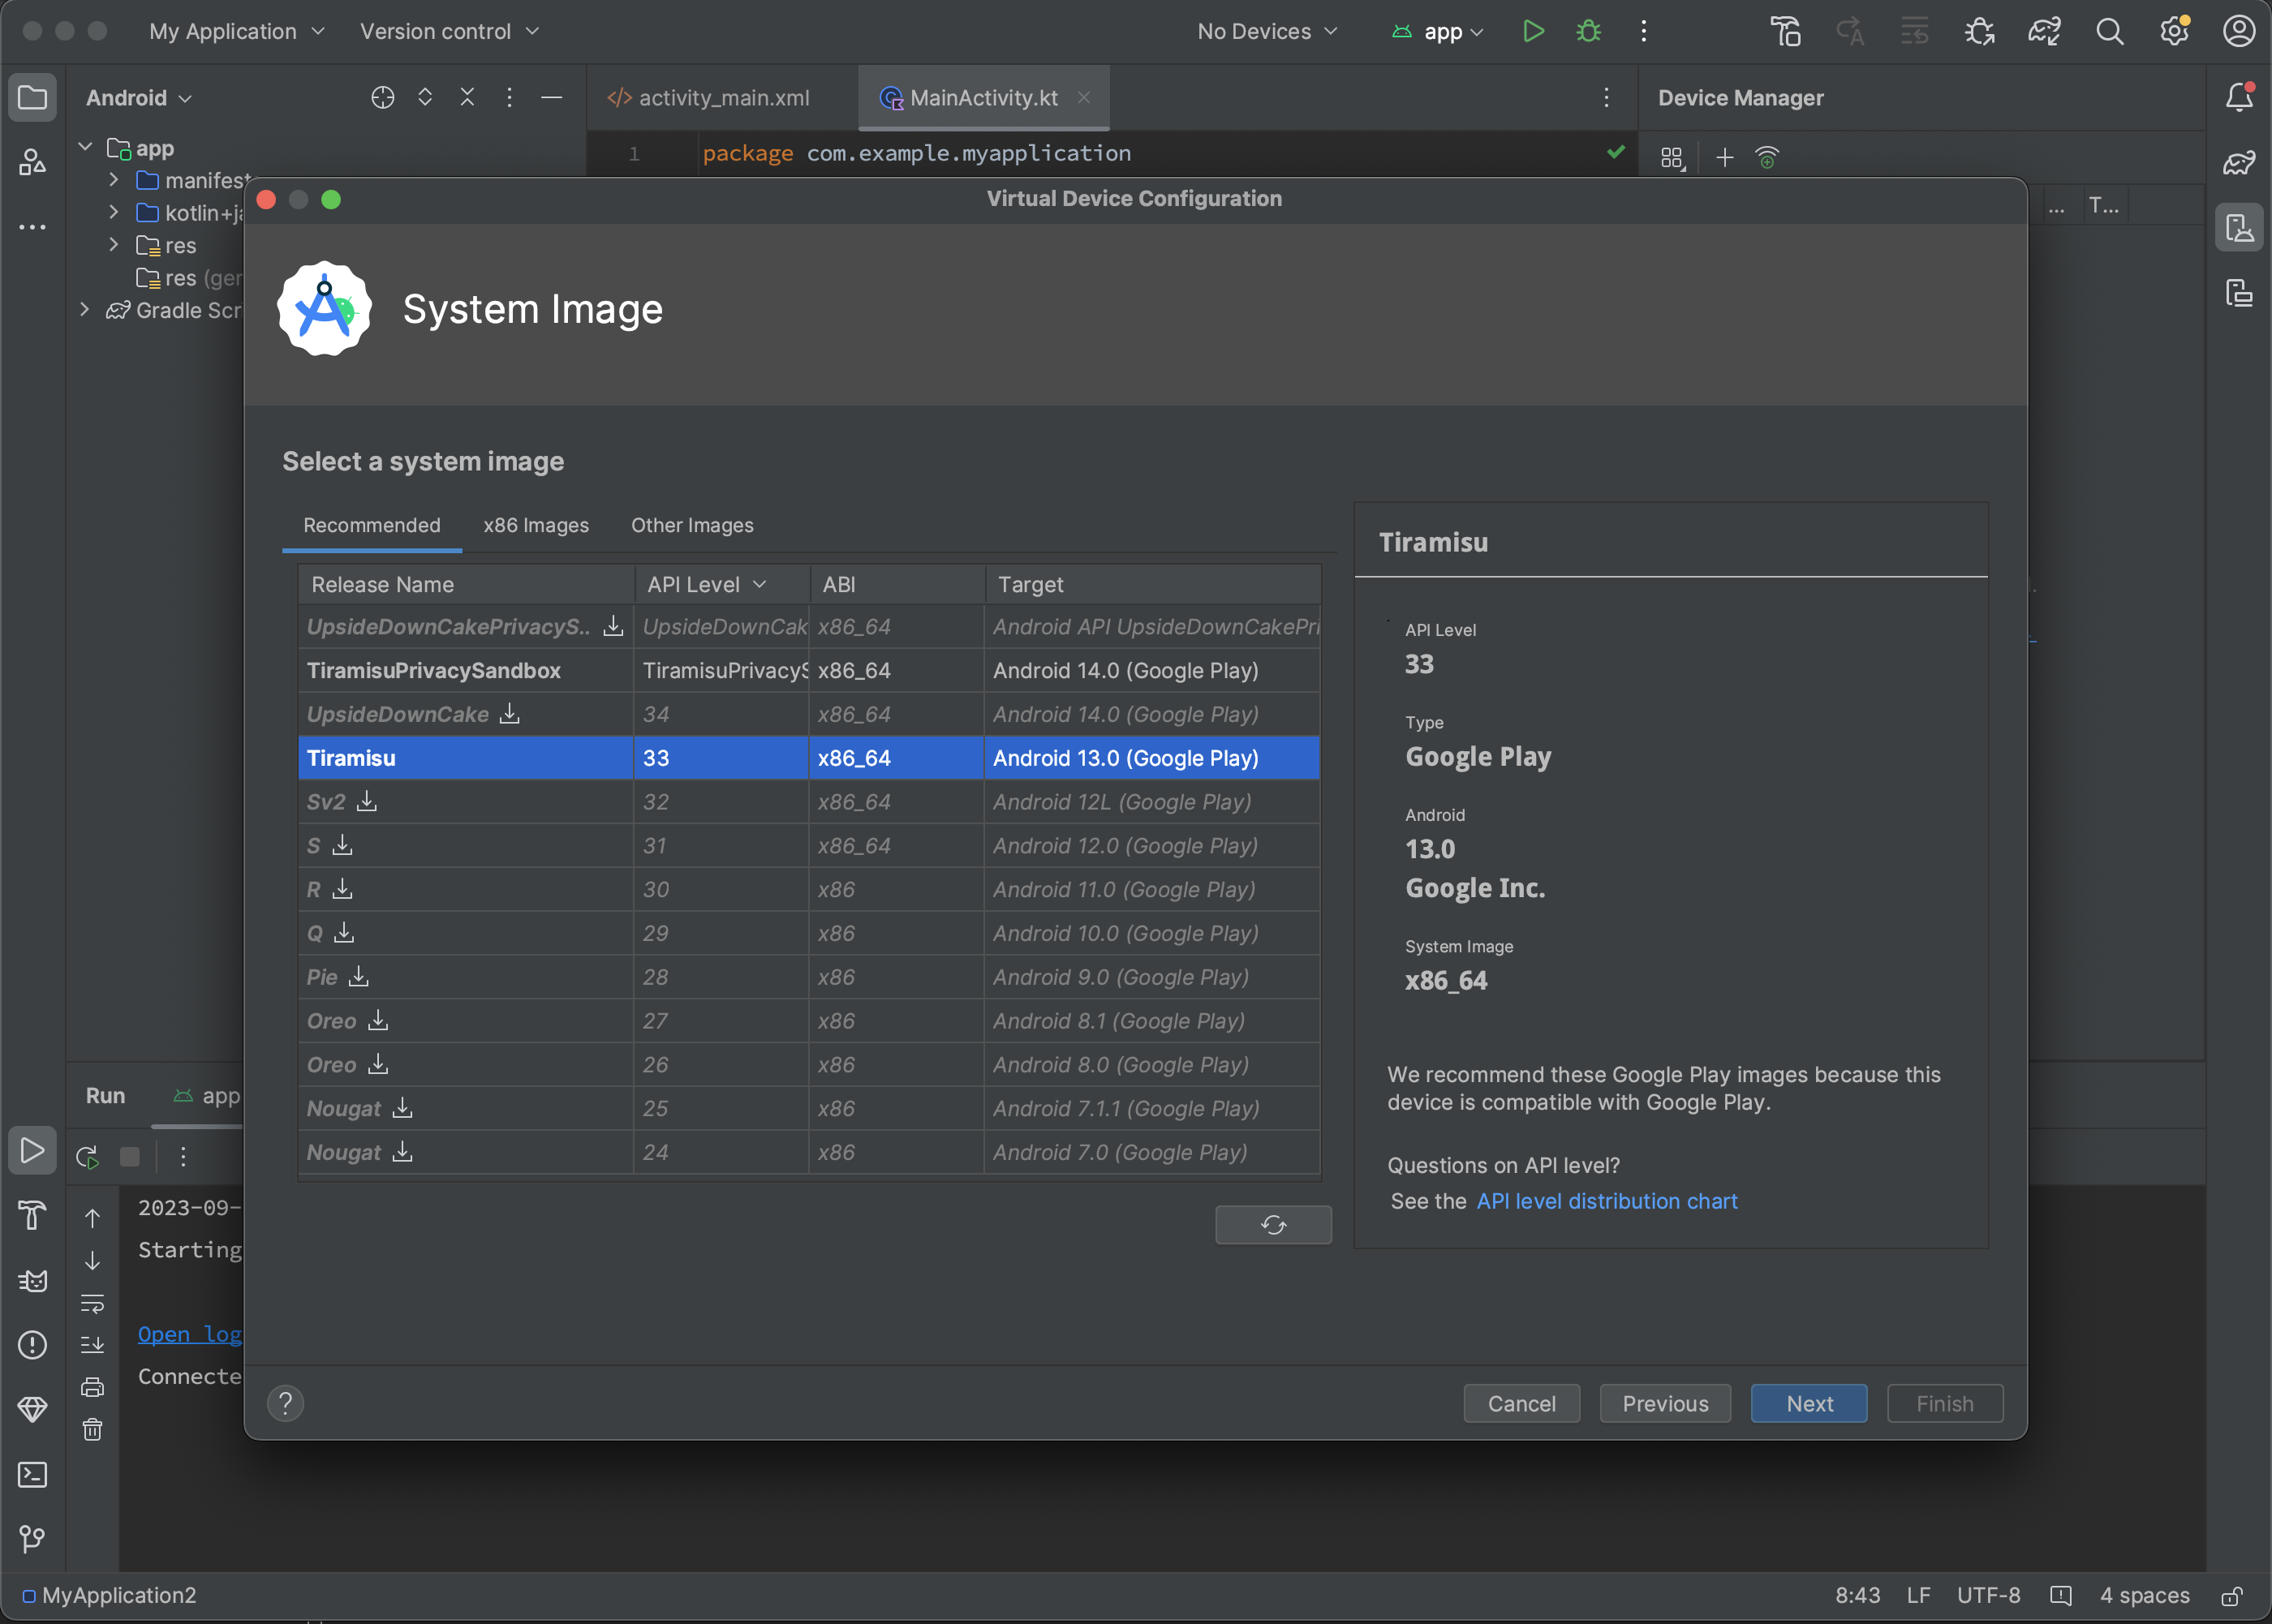
In the screenshot above, simply choose the Android version you need. I recommend not choosing one that's too new or too old. Android 11-13 should work well by the end of 2023. In my screenshot, the SDK is already downloaded, but if you don't have it, select the version you need and click the download icon to the right of the name.
After downloading and selecting the Android version, click Next and you'll see the following settings:
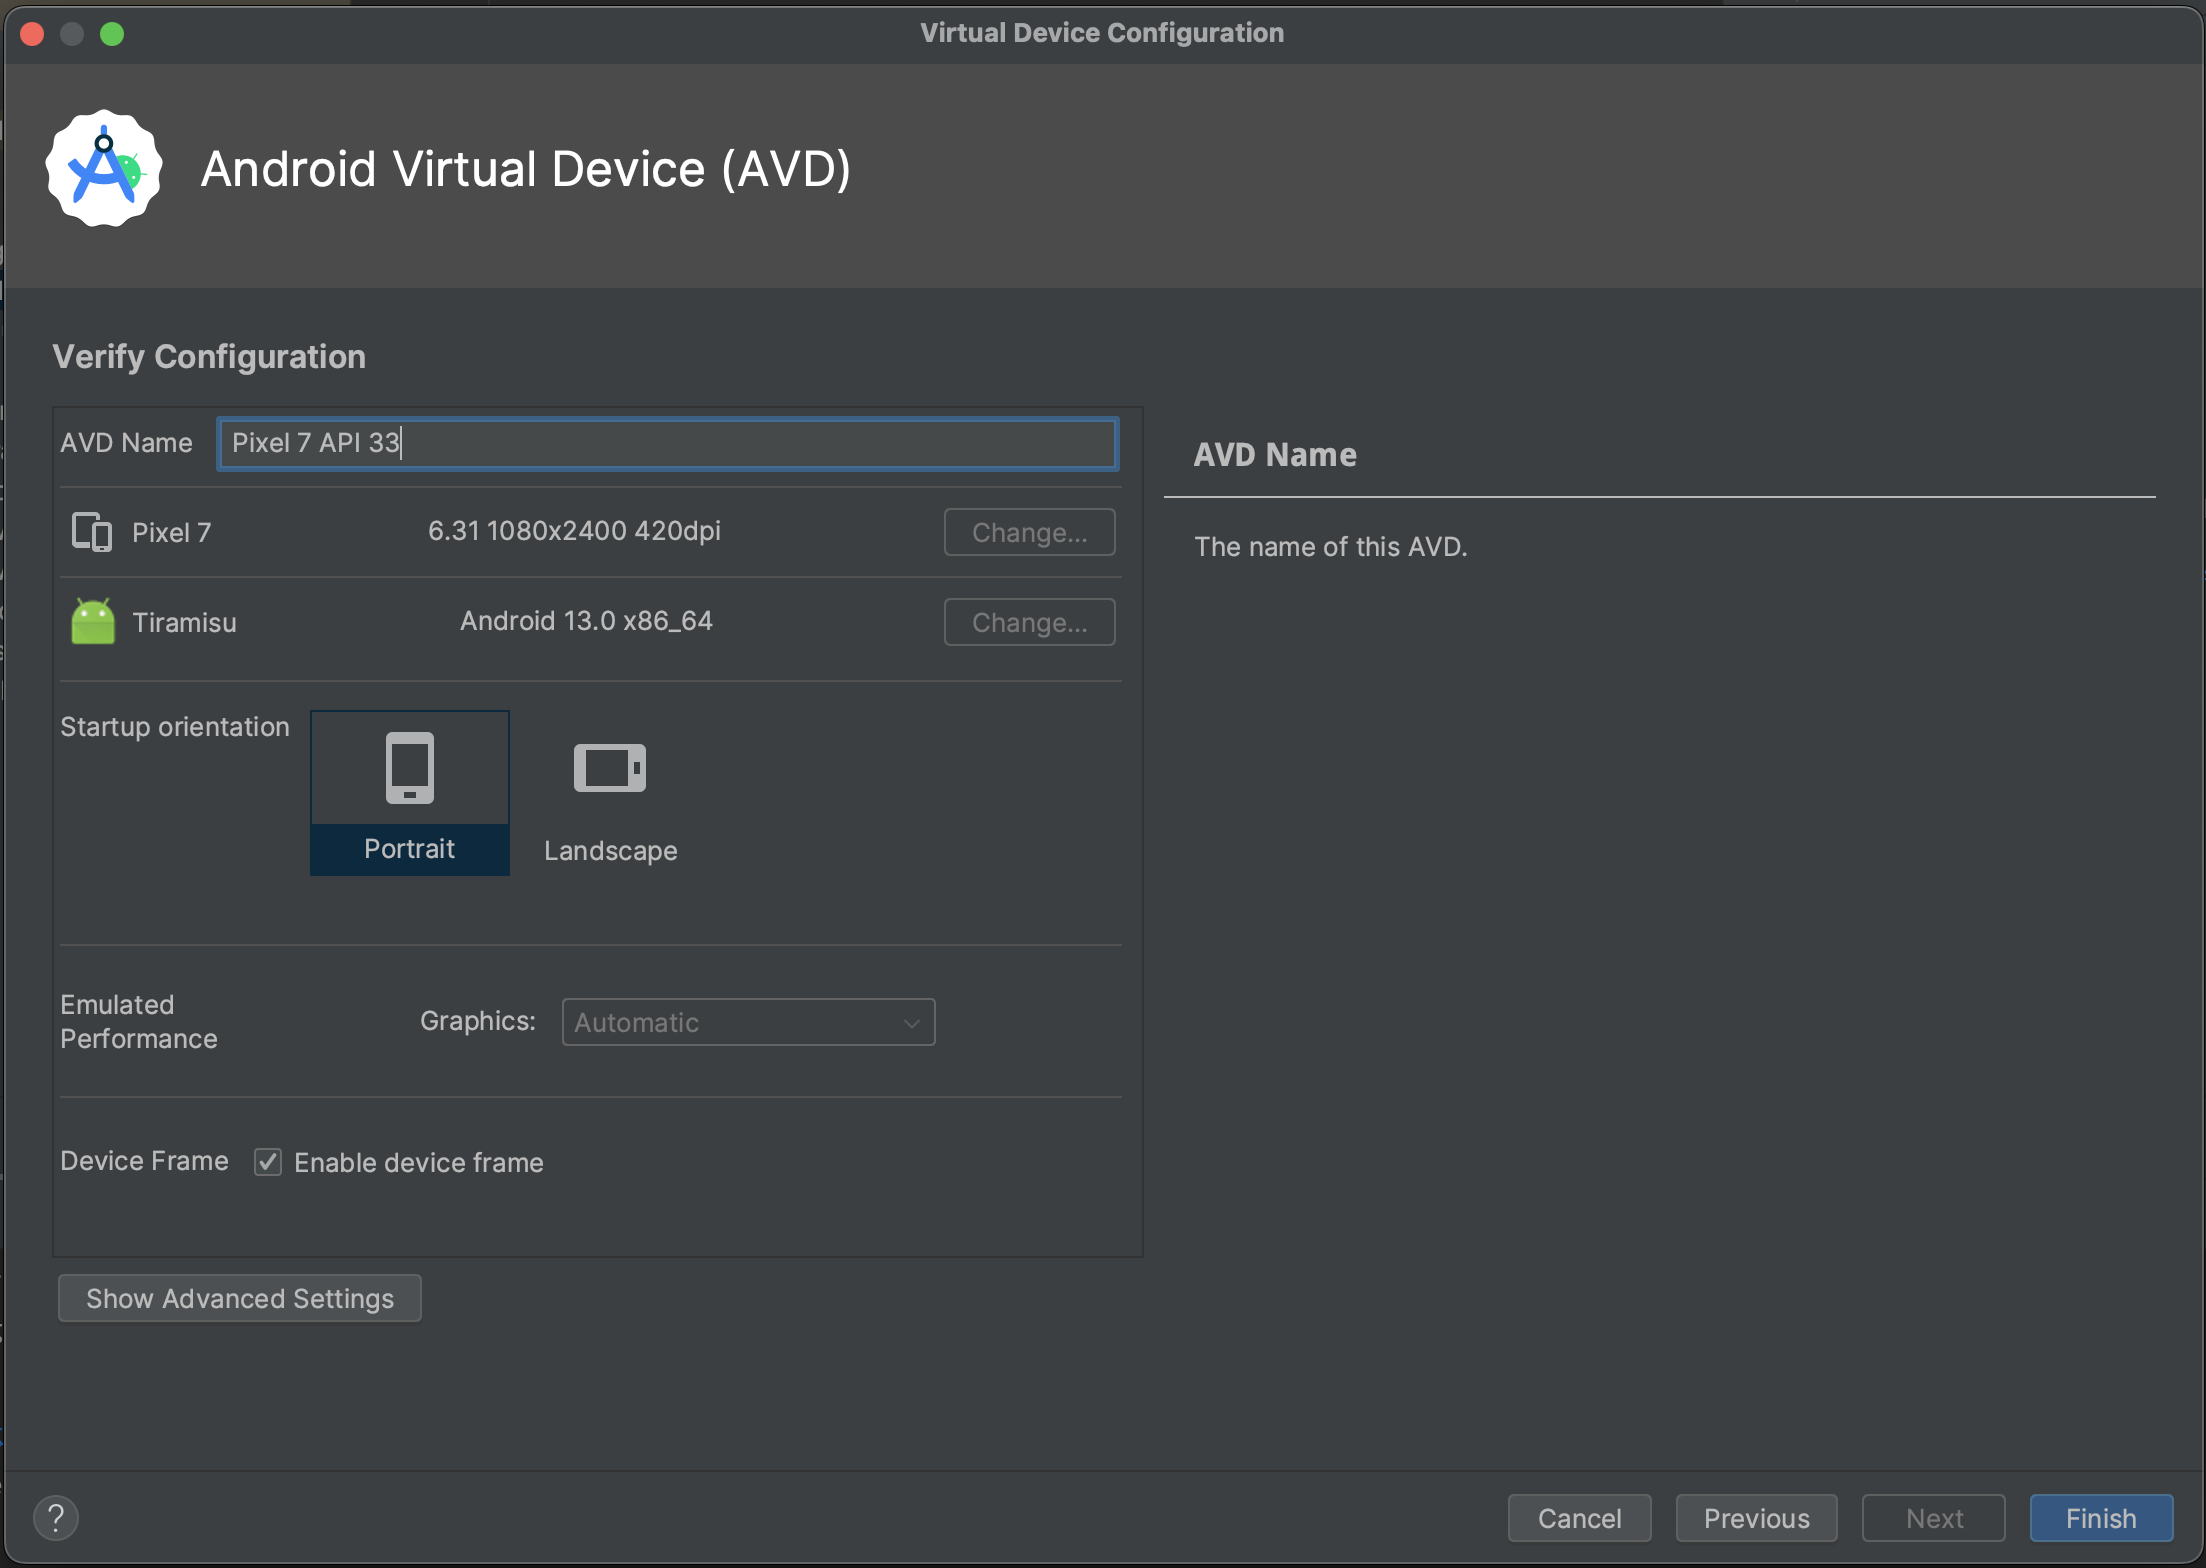
Don't change anything; just click Finish. You have now created your emulator, and it should appear in the list of your devices:
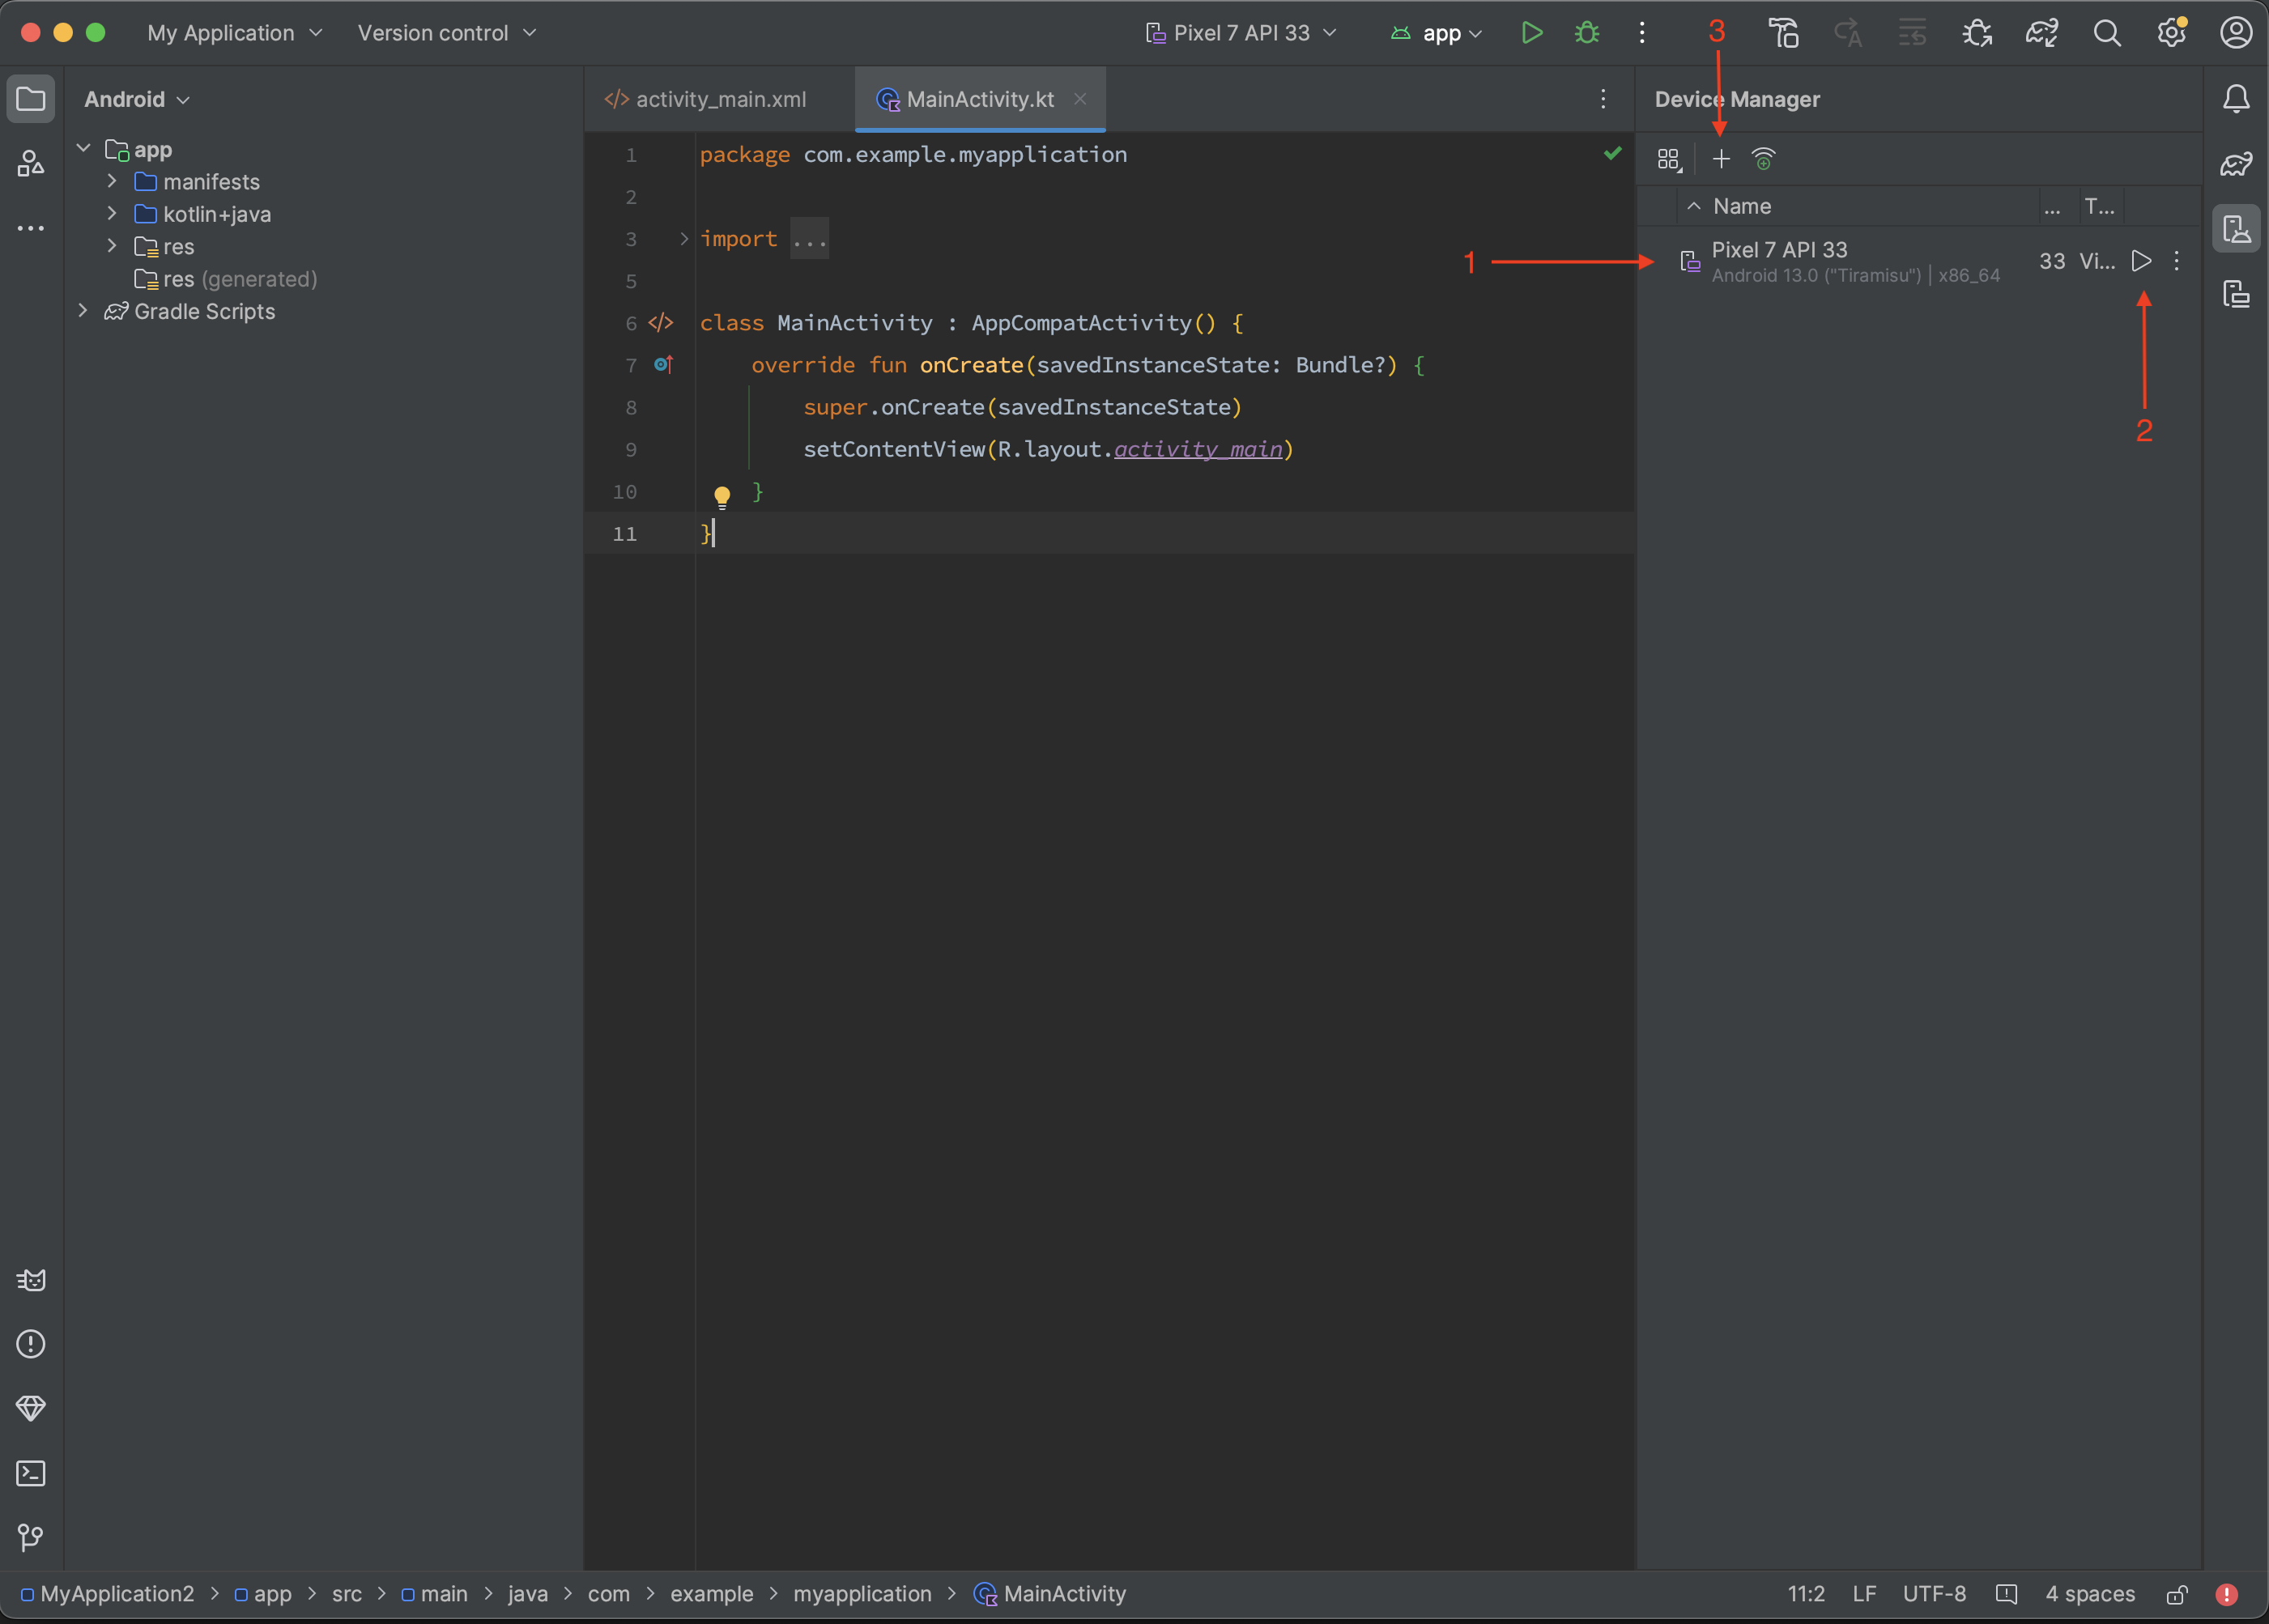
- Our created emulator is shown here, with its name and Android version.
- Button to start our emulator, like turning on a phone.
- Button to create another emulator (in case you need to create more).
Thats it. Emulator is created and ready for work.
If you have a weak computer, you can also connect your Android-based phone to the computer and run your programs there. To do this, you need to enable developer mode and allow app debugging.
Enabling developer mode may vary slightly on devices from different manufacturers, but the general steps are similar. To enable developer mode, go to the settings menu, tap on the About Phone section, find the Build Number, and tap it repeatedly until you see a message stating that “You are now a developer”.
Here are some tips on finding the build number on different devices:
- Google Pixel: Settings > About Phone > Build Number
- Samsung Galaxy S8 and later: Settings > About Phone > Software Information > Build Number
- LG G6 and later: Settings > About Phone > Software Information > Build Number
- HTC U11 and later: Settings > About Phone > Software Information > More/More > Build Number
- OnePlus 5T and later: Settings > About Phone > Build Number
After tapping multiple times, you'll see prompts indicating how many more times you need to tap to become a developer. Keep tapping until you see the message confirming that you are now a developer.
Afterward, in the main settings menu, you'll have a new option called "Developer Options." It looks like this:
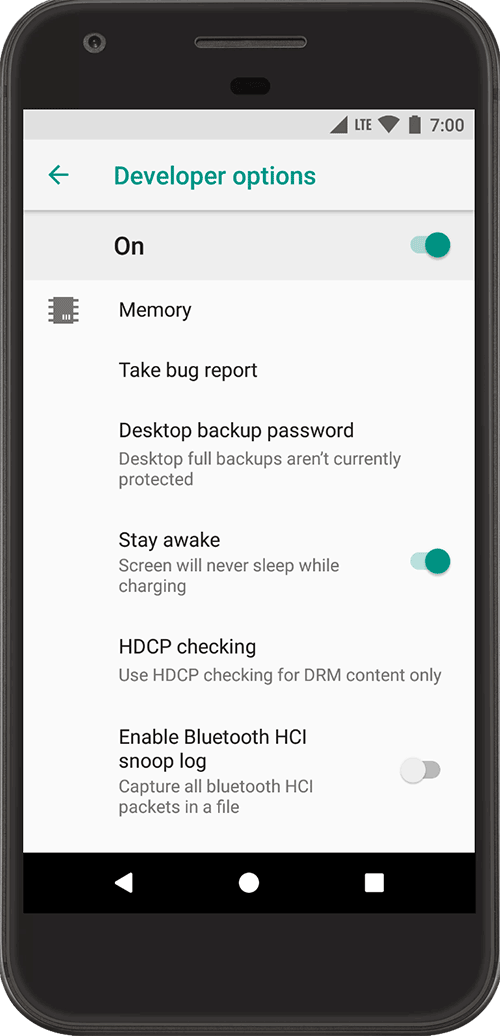
Go into this menu and look for an option called "USB Debugging." Enable it by toggling the switch or checking the box, and you're ready for debugging.
To allow installing your apps on the phone, follow these final three steps:
- Connect your phone to the computer and keep an eye on the phone.
- On the phone, select the connection option (usually charging mode or do nothing).
- A dialog box will appear, requesting permission for debugging. Check the box to allow it and remember this choice (if the option is available).
Example the request should looks like on the phone:
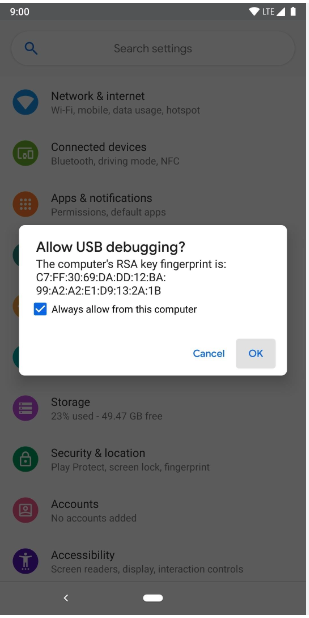
That's it! Now you should see your phone in the list of available devices, alongside the emulator you created, as shown in the screenshot below:
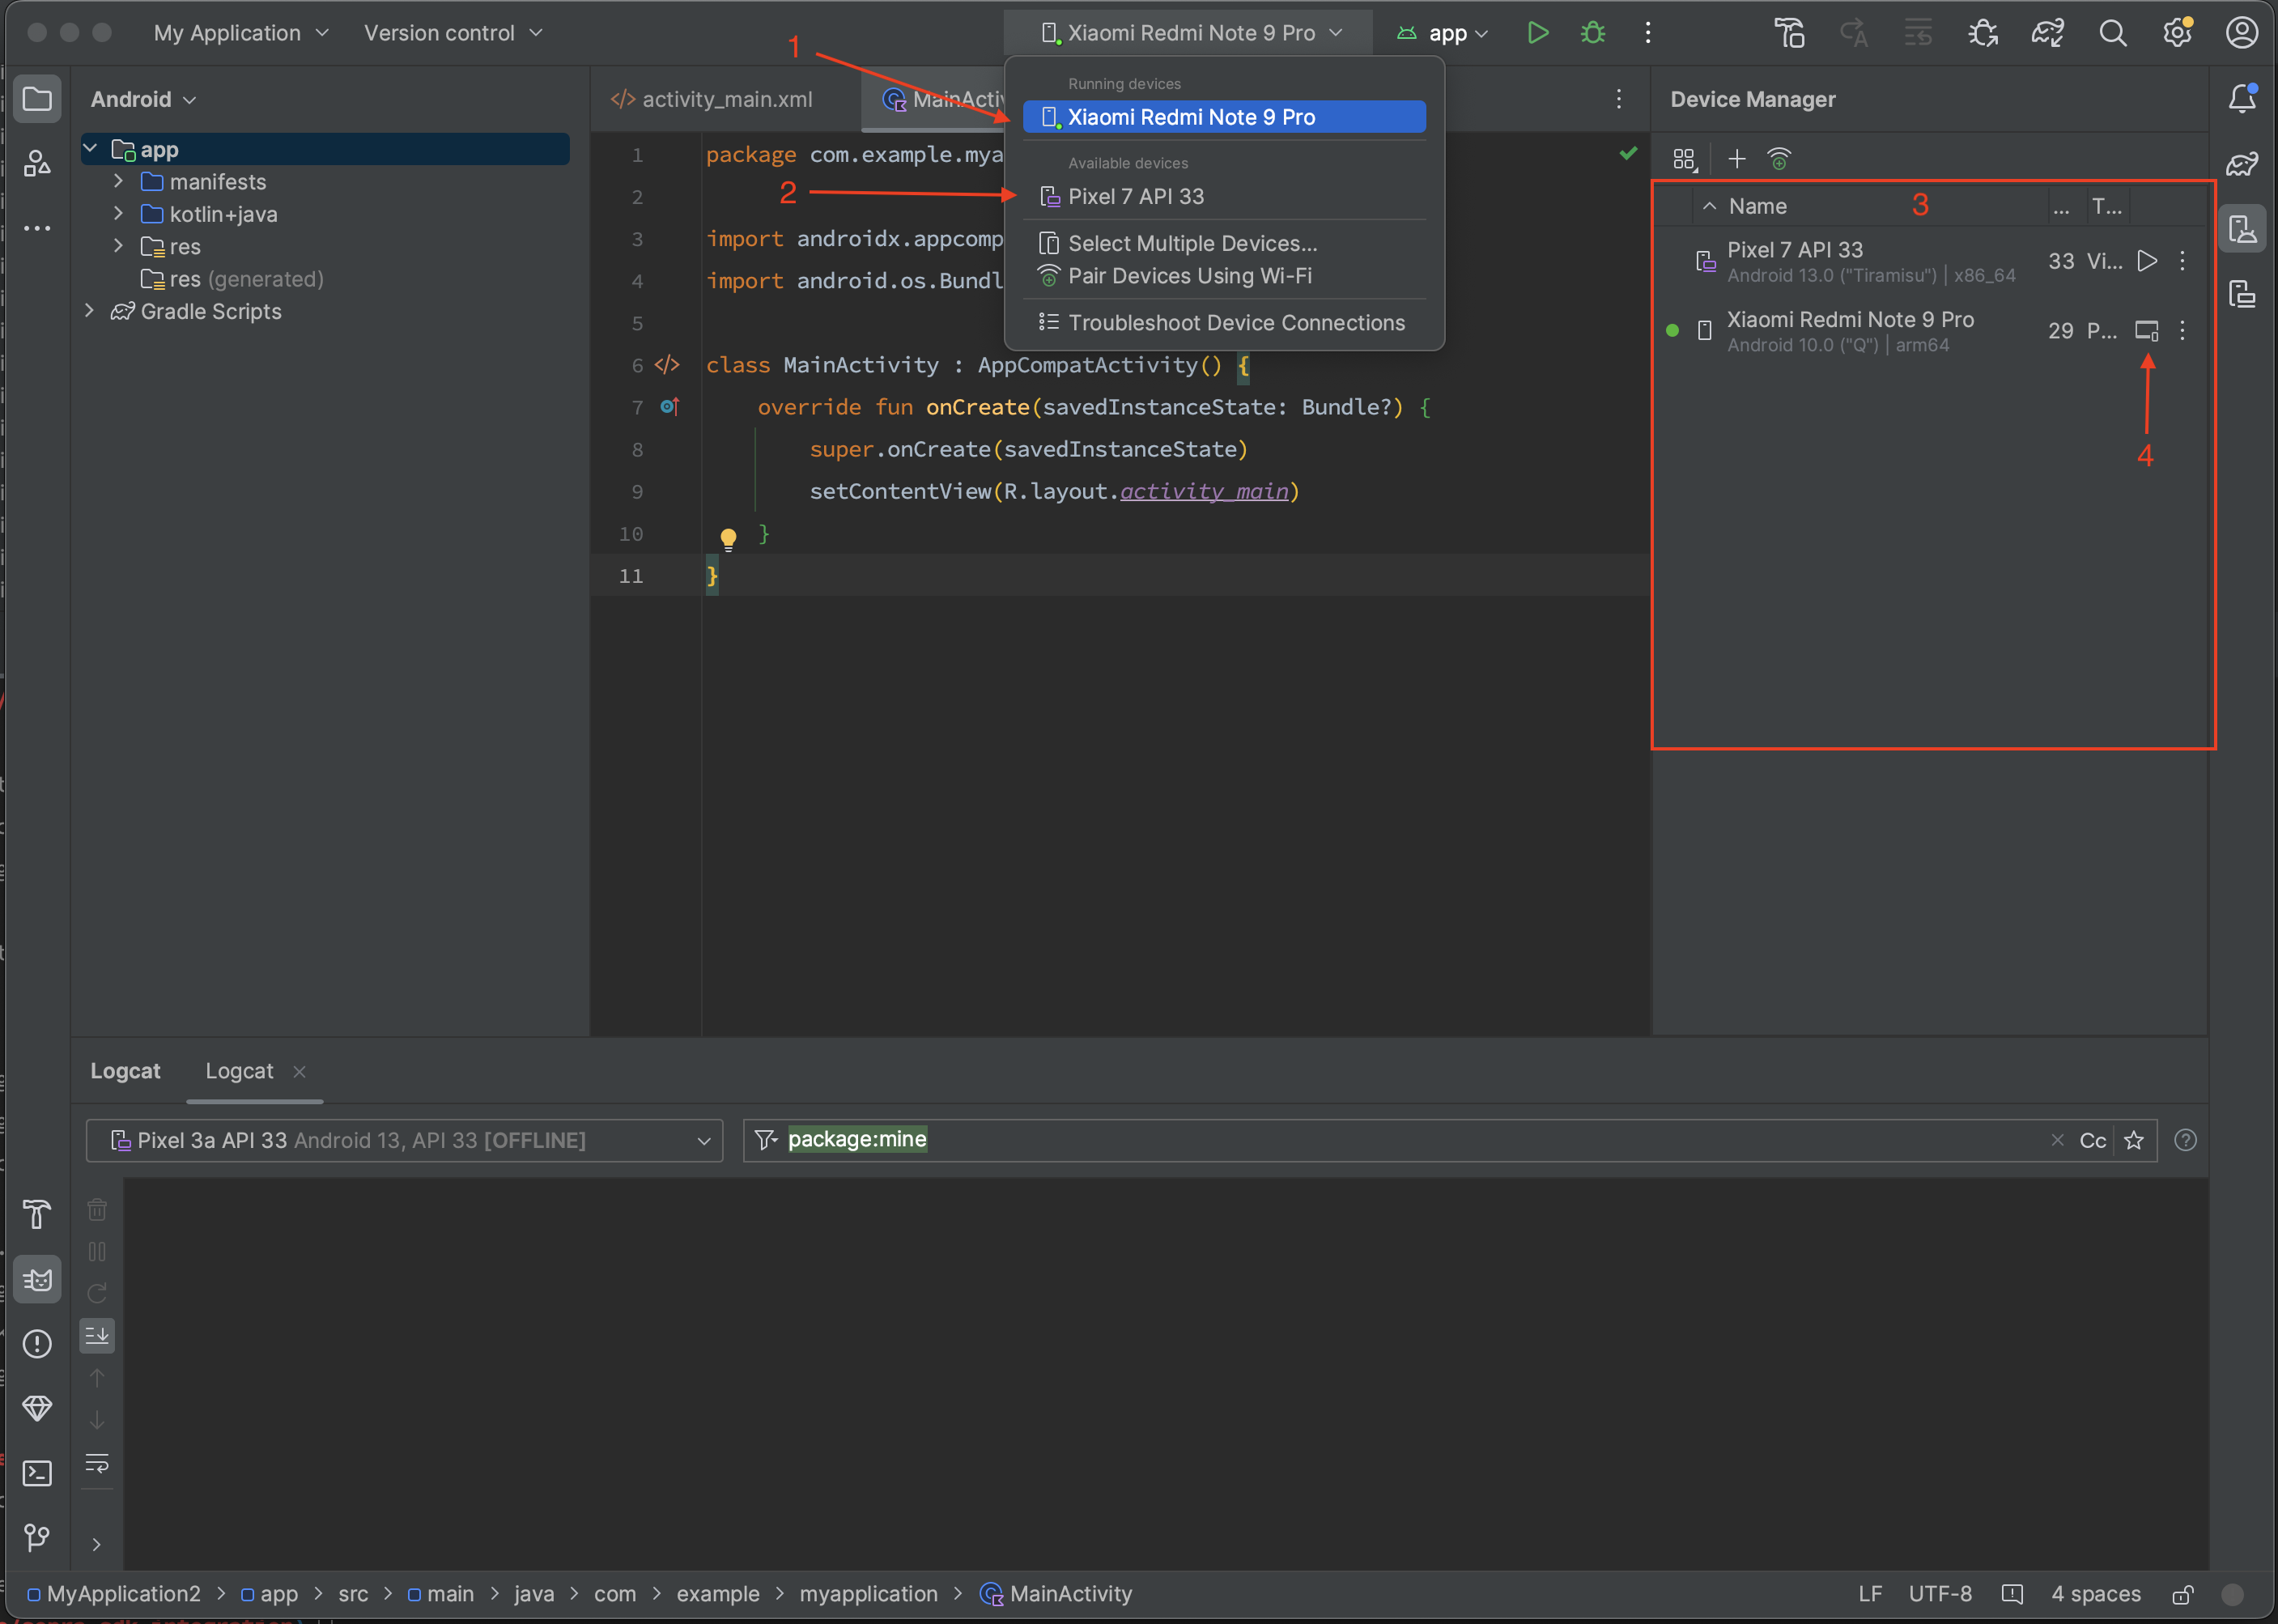
Where it means:
- Our connected phone (label indicates it's running).
- Our created emulator (label indicates it's available but not running).
- The device manager window where you can configure/delete/create emulators.
- The device mirroring button, which allows you to see what's happening on the phone inside Android Studio—very useful for weaker computers.
That's all there is to it. Select the device from either point 1 or 2 and click the green triangle on the right! This is the start button, and it launches our program on the selected device. After a successful launch, you should see something similar to the screenshot below:
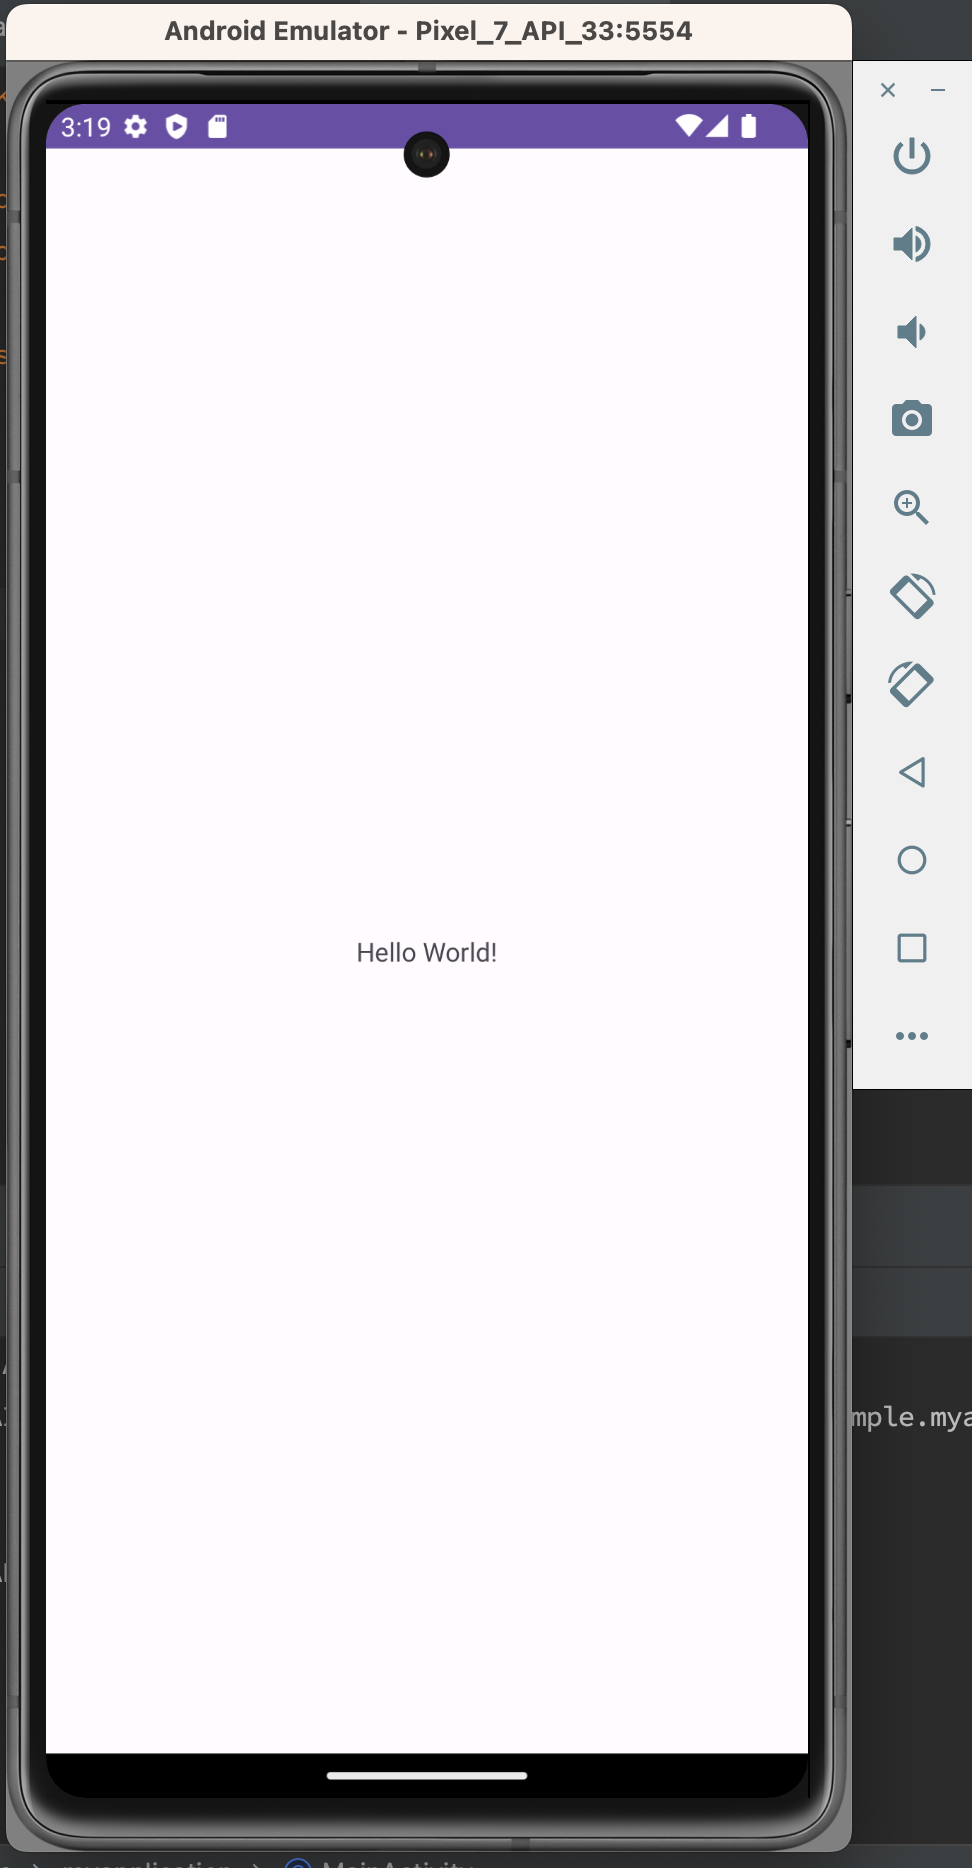
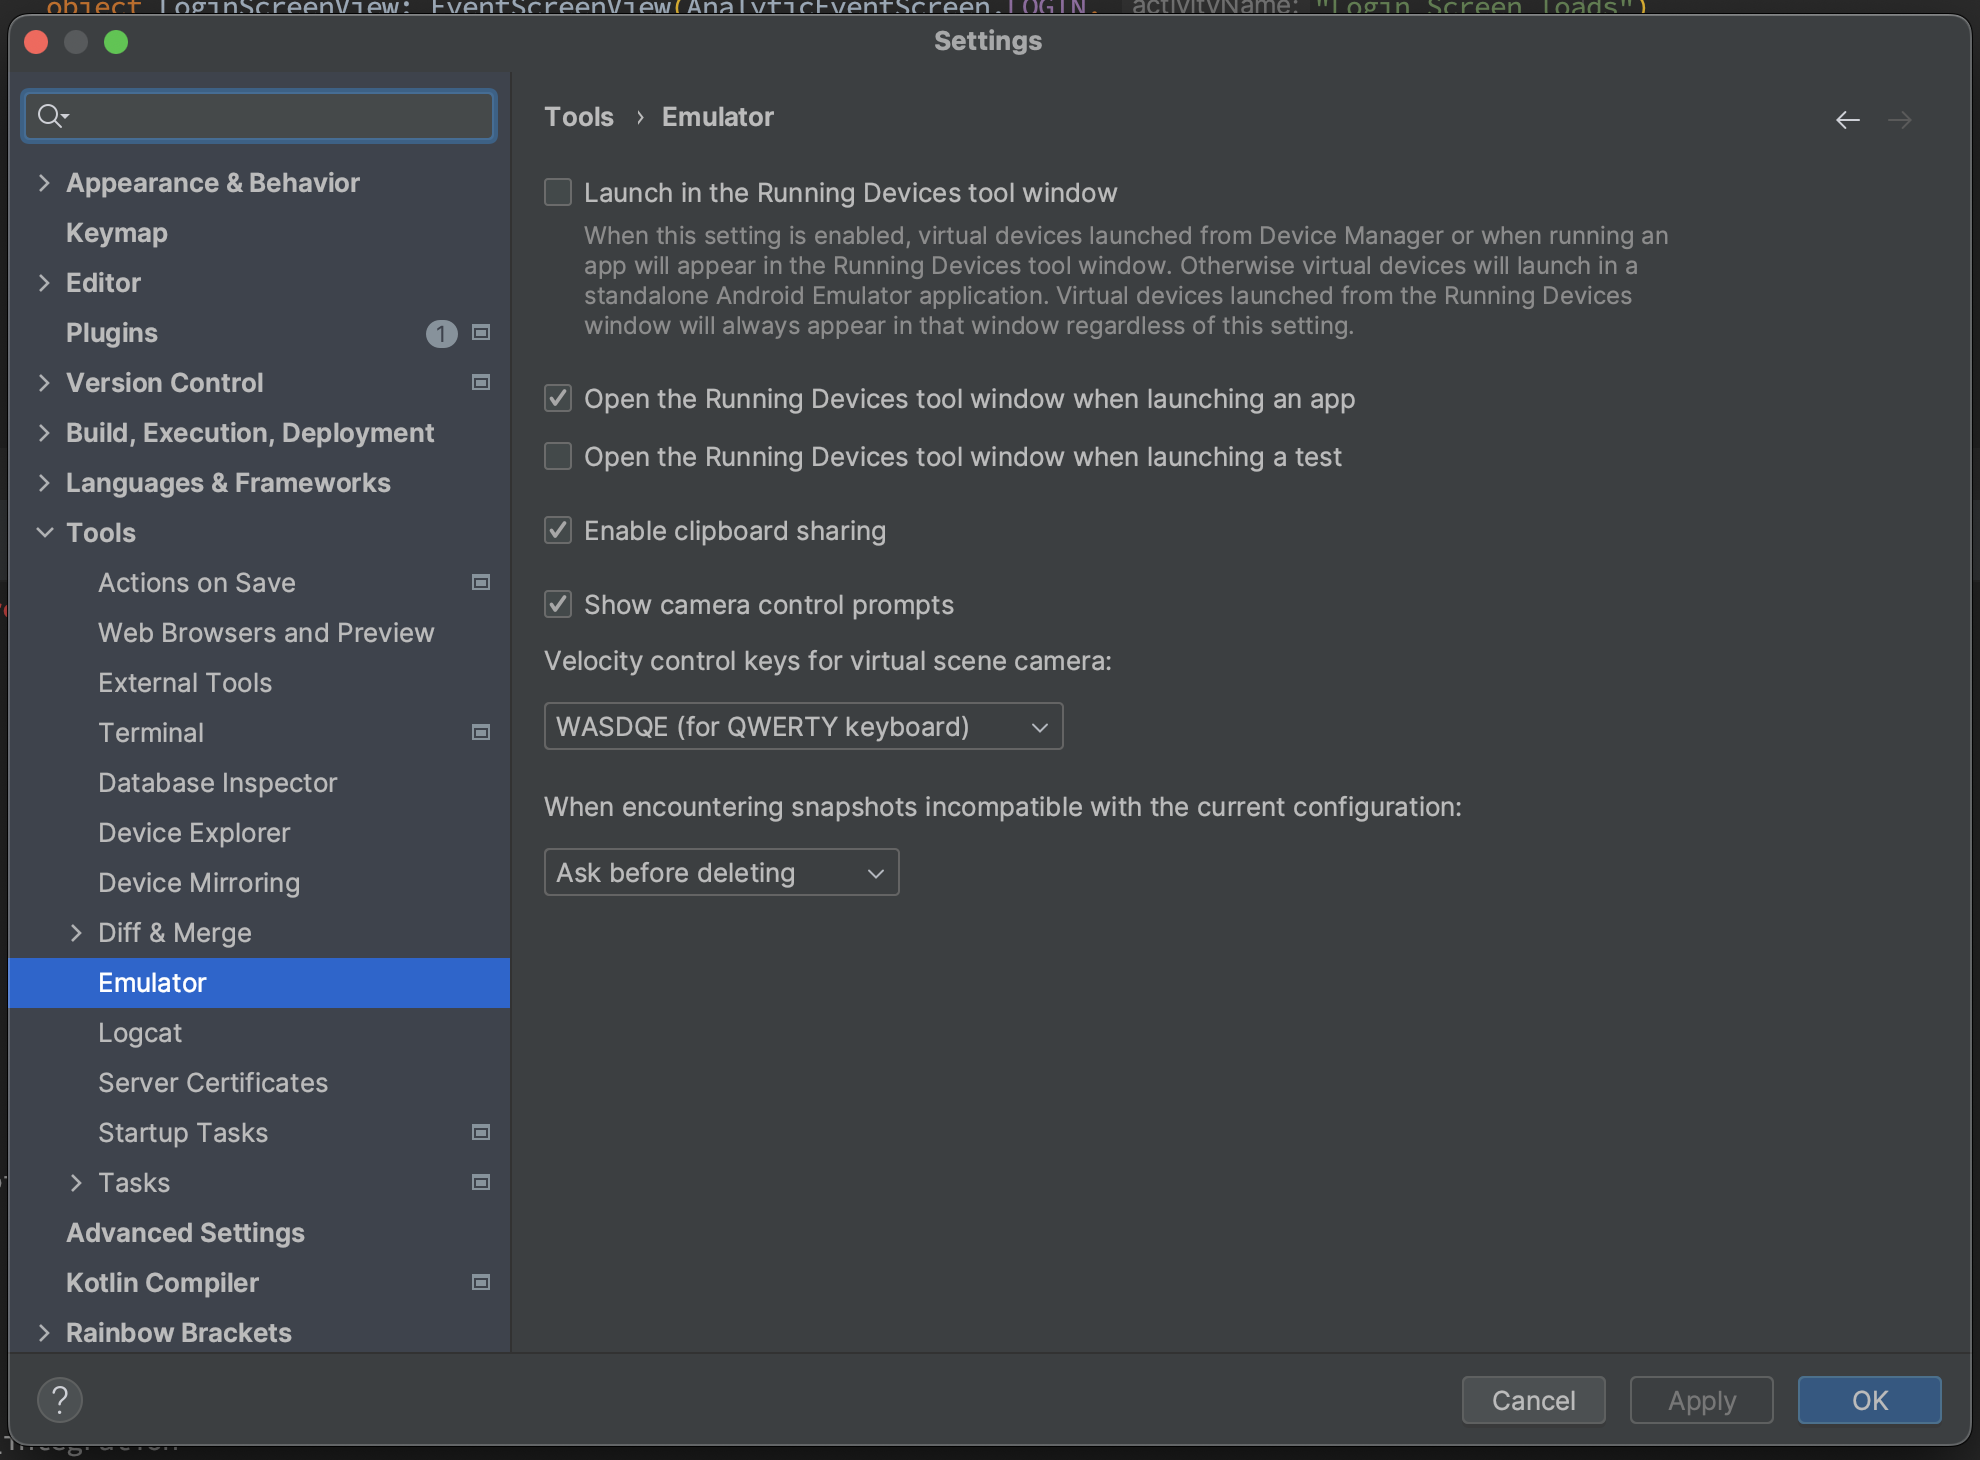
This is the running program on the emulator. If it runs inside Android Studio, and you want the emulator to be a separate program, you can change this in the settings by unchecking the option: Android Studio > File > Settings > Tools > Emulator > Launch in the Running Devices tools window, as shown in the screenshot.
That's it for now. In the next lesson, we will explore the project structure and the Android Studio interface.
Have a question? Ask our community in Telegram - Start-Develop RU / Start-Develop EN